 List of Fruits Recipe
 List of recipes of all major fruits.
Amla Fruit Recipe
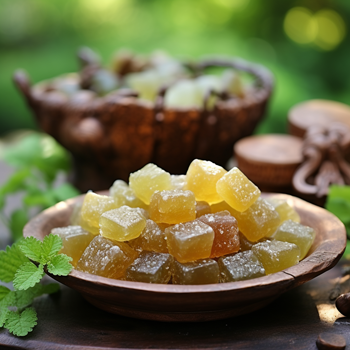
1)![]() Ingredients For Amla Candy Recipe:
Ingredients For Amla Candy Recipe:
- 250 grams fresh amla fruit (Indian gooseberries)
- 1 cup sugar
- 1/2 cup water
- 1/4 teaspoon black salt (optional)
- 1/4 teaspoon black pepper powder (optional)
- A pinch of saffron strands (optional)
- A pinch of cardamom powder (optional)
![]() Instruction For Amla Candy Recipe:
Instruction For Amla Candy Recipe:
- Wash the amla fruit thoroughly and pat them dry with a clean kitchen towel.
- Using a sharp knife, slice the amla fruit into thin rounds or halves. Remove the seeds if you prefer, although they are edible.
- In a bowl, add the sliced amla fruit and sprinkle a little black salt over them. Toss them gently to coat the amla slices evenly with the salt. This step is optional but adds a nice savory touch to the candy.
- In a separate saucepan, combine sugar and water. Heat the mixture over medium heat, stirring until the sugar dissolves completely.
- Once the sugar has dissolved, let the syrup come to a boil. Reduce the heat to low and simmer for a few minutes until the syrup thickens slightly. You can test the syrup by taking a small drop between your fingers; it should form a soft ball when cooled.
- At this stage, you can add optional flavorings like a pinch of saffron strands and cardamom powder for added flavor.
- Remove the syrup from heat and let it cool slightly for a minute or two.
- Carefully add the sliced amla fruit to the hot syrup. Be cautious as the syrup is very hot.
- Stir the amla fruit slices gently in the syrup until they are well coated.
- Allow the amla fruit slices to soak in the syrup for about 5-10 minutes, ensuring they absorb the sweetness.
- After soaking, remove the amla fruit slices from the syrup using a slotted spoon and spread them on a parchment paper-lined tray or plate. Let them cool and dry for a few hours or overnight.
- Once the amla candy recipe slices are completely dry, they will become firm and ready to eat.
- Store the amla candy recipe in an airtight container at room temperature. They will stay good for several weeks.
Apple Fruit Recipe
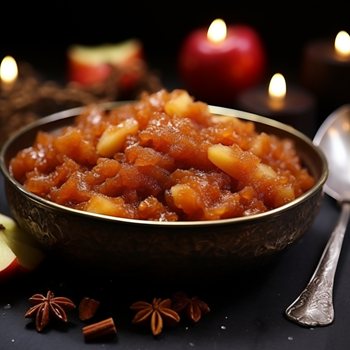
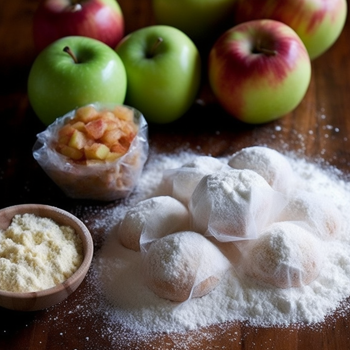
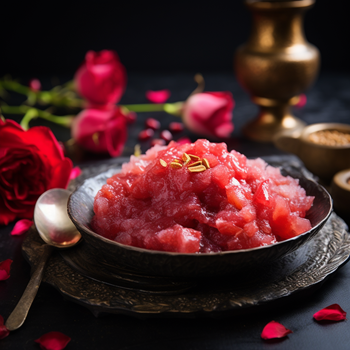
2)![]() Ingredients For Apple Halwa Recipe:
Ingredients For Apple Halwa Recipe:
- 4 medium-sized apples fruit, peeled, cored, and grated
- 1/2 cup sugar (adjust to taste)
- 2 tablespoons ghee (clarified butter)
- 1/2 teaspoon cardamom powder
- 2-3 tablespoons chopped nuts (almonds, cashews, or pistachios)
- A pinch of saffron strands (optional)
- A few raisins (optional)
- A pinch of edible food color (optional)
![]() Instruction For Apple Halwa Recipe:
Instruction For Apple Halwa Recipe:
- Start by peeling, coring, and grating the apples fruit. You can use a box grater or a food processor for this.
- Heat 1 tablespoon of ghee in a heavy-bottomed pan or kadai over medium heat.
- Add the grated apples fruit to the pan and sauté them in the ghee. Cook the apples fruit until they turn soft and start releasing their juices. Stir occasionally to prevent sticking.
- Once the apples fruit are soft and most of the liquid has evaporated, add the sugar to the pan. Adjust the amount of sugar according to your taste and the sweetness of the apples.
- Continue cooking the apples fruit with sugar, stirring frequently, until the mixture thickens and the sugar dissolves completely. This may take around 10-15 minutes.
- Add cardamom powder and saffron strands (if using) to the mixture and mix well. Cardamom powder adds a lovely fragrance to the halwa.
- In a separate small pan, heat the remaining tablespoon of ghee and lightly roast the chopped nuts and raisins (if using) until they become golden brown. This step enhances their flavor.
- Add the roasted nuts and raisins to the apple fruit mixture and stir well.
- If you want to add a touch of color to your apple halwa recipe, dissolve a pinch of edible food color in a teaspoon of water and add it to the halwa. Mix until the color is evenly distributed. This step is entirely optional.
- Continue cooking the halwa, stirring constantly, until it thickens further and leaves the sides of the pan. You'll notice the ghee separating from the mixture, which is a good sign.
- Once the halwa reaches the desired consistency and ghee starts to separate, remove it from the heat.
- Transfer the apple halwa recipe to a serving dish and garnish with some more chopped nuts if you like.
- Serve the apple halwa recipe hot or warm. It's a delightful dessert that can be enjoyed on its own or with a scoop of vanilla ice cream.
Apricot Fruit Recipe
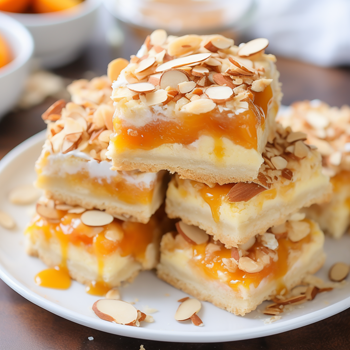
3)![]() Ingredients For Apricot Cheesecake Bars Recipe:
Ingredients For Apricot Cheesecake Bars Recipe:
For The Crust:
- 1 1/2 cups graham cracker crumbs
- 1/4 cup granulated sugar
- 1/2 cup unsalted butter, melted
- 16 oz (2 packages) cream cheese, softened
- 1/2 cup granulated sugar
- 2 large eggs
- 1 teaspoon vanilla extract
- 2 cups fresh apricots fruit, pitted and chopped (about 8-10 apricots)
- 1/3 cup granulated sugar
- 1/4 cup water
- 1 tablespoon cornstarch
- Sliced almonds (optional)
![]() Instruction For Apricot Cheesecake Bars Recipe:
Instruction For Apricot Cheesecake Bars Recipe:
- Preheat your oven to 325°F (160°C). Grease a 9x9-inch (23x23 cm square baking pan or line it with parchment paper, leaving some overhang on the sides for easy removal.
- In a mixing bowl, combine the graham cracker crumbs, granulated sugar, and melted butter. Mix until the crumbs are evenly coated with butter.
- Press the graham cracker mixture into the bottom of the prepared baking pan, creating an even layer. Use the back of a spoon or a flat-bottomed glass to press it down firmly.
- Bake the crust in the preheated oven for about 10 minutes or until it just starts to turn golden. Remove it from the oven and set it aside to cool.
- In a separate mixing bowl, beat the softened cream cheese until it's smooth and creamy.
- Add the granulated sugar, eggs, and vanilla extract to the cream cheese. Beat until all the ingredients are well combined and the mixture is smooth.
- In a saucepan, combine the chopped apricots, granulated sugar, water, and cornstarch. Stir well to combine.
- Cook the apricot fruit mixture over medium heat, stirring constantly, until it thickens and the apricots soften, about 5-7 minutes.
- Remove the apricot fruit mixture from the heat and let it cool slightly.
- Pour the cream cheese mixture over the baked graham cracker crust, spreading it evenly.
- Spoon the apricot fruit topping over the cream cheese layer.
- If desired, sprinkle sliced almonds on top for a decorative touch.
- Bake in the preheated oven for 30-35 minutes, or until the edges are set, and the center is slightly jiggly.
- Remove the pan from the oven and allow it to cool to room temperature. Then refrigerate the cheesecake bars for several hours or overnight to set completely.
- Once set, use the parchment paper overhang to lift the cheesecake out of the pan. Cut it into bars or squares.
- Serve your apricot cheesecake bars recipe chilled, and enjoy!
Avocado Fruit Recipe
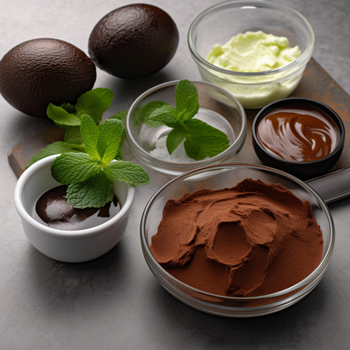
4)![]() Ingredients For Avocado Mint Fudge Bars Recipe:
Ingredients For Avocado Mint Fudge Bars Recipe:
For The Crust:
- 1 cup almond flour
- 1/4 cup unsweetened cocoa powder
- 1/4 cup melted coconut oil
- 2 tablespoons maple syrup or honey (adjust to taste)
- Pinch of salt
- 2 ripe avocados fruit, peeled and pitted
- 1/4 cup unsweetened cocoa powder
- 1/4 cup melted coconut oil
- 1/4 cup maple syrup or honey (adjust to taste)
- 1/2 teaspoon mint extract or 1/4 cup fresh mint leaves (adjust to taste)
- A pinch of salt
- Fresh mint leaves
- Grated chocolate
![]() Instruction For Avocado Mint Fudge Bars Recipe:
Instruction For Avocado Mint Fudge Bars Recipe:
For The Crust:
- Preheat your oven to 350°F (175°C). Line an 8x8-inch (20x20 cm) square baking pan with parchment paper, leaving some overhang on the sides for easy removal.
- In a mixing bowl, combine almond flour, cocoa powder, melted coconut oil, maple syrup (or honey), and a pinch of salt. Mix until the ingredients are well combined.
- Press the mixture firmly into the bottom of the prepared baking pan to create an even crust.
- Bake the crust in the preheated oven for about 10 minutes. Remove it from the oven and let it cool while you prepare the avocado mint fudge recipelayer.
- In a blender or food processor, combine the peeled and pitted avocados fruit, unsweetened cocoa powder, melted coconut oil, maple syrup (or honey), mint extract (or fresh mint leaves), and a pinch of salt.
- Blend until the mixture is smooth and creamy. Taste and adjust the sweetness or mint flavor if desired.
- Pour the avocado mint fudge recipe mixture over the cooled crust in the baking pan.
- Use a spatula to spread the mixture evenly, smoothing the top.
- If desired, garnish the top with fresh mint leaves and grated chocolate.
- Place the baking pan in the refrigerator and let the bars chill for at least 2-3 hours, or until they are set and firm.
- Once the bars are set, use the parchment paper overhang to lift them out of the pan. Place them on a cutting board and cut into squares or bars.
- Serve your avocado mint fudge bars recipe chilled. Enjoy the unique and delightful combination of avocado and mint recipe!
Banana Fruit Recipe
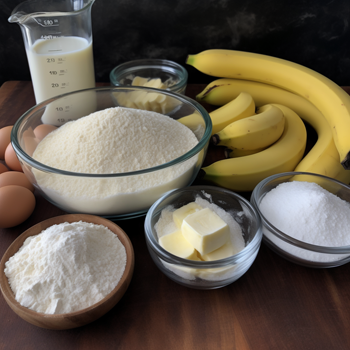
5)![]() Ingredients For Banana Mousse Recipe:
Ingredients For Banana Mousse Recipe:
- 2 ripe bananas fruit
- 1/4 cup granulated sugar (adjust to taste)
- 1 teaspoon lemon juice
- 1 teaspoon vanilla extract
- 1 cup heavy cream
- 2 tablespoons powdered sugar (adjust to taste)
- Banana slices, for garnish (optional)
![]() Instruction For Banana Mousse Recipe:
Instruction For Banana Mousse Recipe:
Prepare The Banana Puree:
- Peel the ripe bananas fruit and cut them into small pieces.
- Place the banana fruit pieces in a blender or food processor.
- Add granulated sugar, lemon juice, and vanilla extract to the blender.
- Blend until you have a smooth and creamy banana puree. Taste the puree and adjust the sugar if needed, depending on the sweetness of the banana fruit.
- In a separate mixing bowl, pour in the heavy cream.
- Add the powdered sugar to the cream.
- Using an electric mixer or a whisk, whip the cream until stiff peaks form. Make sure not to overwhip; you want the cream to be firm but not grainy.
- Gently fold the banana fruit puree into the whipped cream using a spatula. Be careful not to deflate the whipped cream too much. Fold until the mixture is well combined and has a uniform texture.
- Spoon the banana mousse into serving glasses or bowls.
- Cover and refrigerate the mousse for at least 2-3 hours or until it's nicely chilled and set.
- Before serving, you can garnish the banana mousse recipe with banana slices or a dollop of whipped cream if desired.
- Enjoy your homemade banana mousse recipe as a delicious and creamy dessert!
Blackcurrant Fruit Recipe
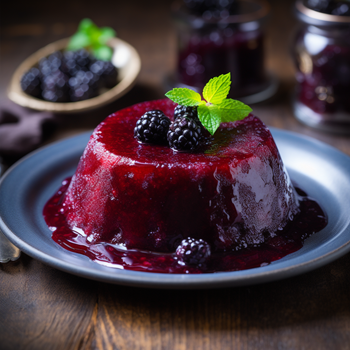
6)![]() Ingredients For Blackcurrant Pudding Recipe:
Ingredients For Blackcurrant Pudding Recipe:
For The Pudding:
- 2 cups fresh or frozen blackcurrants fruit
- 1 cup granulated sugar
- 1 cup all-purpose flour
- 2 tsp baking powder
- A pinch of salt
- 1 cup milk
- 1/4 cup unsalted butter, melted
- 1 tsp vanilla extract
- 1 cup blackcurrant jam or preserves
- 1/4 cup water
![]() Instruction For Blackcurrant Pudding Recipe:
Instruction For Blackcurrant Pudding Recipe:
- Preheat your oven to 350°F (175°C). Grease a baking dish or pudding mold.
- In a medium saucepan, combine the blackcurrants fruit and sugar. Cook over medium heat until the blackcurrants release their juices and the sugar has dissolved, stirring occasionally. This should take about 5-7 minutes. Remove from heat and set aside.
- In a mixing bowl, whisk together the flour, baking powder, and salt.
- In another bowl, combine the melted butter, milk, and vanilla extract.
- Gradually add the wet ingredients to the dry ingredients, stirring until you have a smooth batter.
- Pour the batter into the greased baking dish or pudding mold.
- Spoon the cooked blackcurrants fruit evenly over the batter. Don't stir; just let them sit on top.
- In a small saucepan, heat the blackcurrant fruit jam or preserves and water over low heat until the mixture is warm and easily pourable. This will be your sauce.
- Carefully pour the warm blackcurrant fruit sauce over the back of a spoon onto the pudding batter. This will create a sauce layer on top of the pudding.
- Place the baking dish or pudding mold in the preheated oven and bake for 30-35 minutes or until the pudding is golden brown and the sauce is bubbling.
- Remove the pudding from the oven and let it cool for a few minutes before serving.
- Serve the blackcurrant pudding recipe warm, either plain or with a scoop of vanilla ice cream or a dollop of whipped cream for extra indulgence.
Blueberry Fruit Recipe
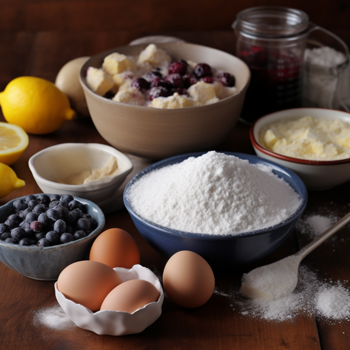
7)![]() Ingredients For Lemon Blueberry Bars Recipe:
Ingredients For Lemon Blueberry Bars Recipe:
For The Crust::
- 1 1/2 cups all-purpose flour
- 1/2 cup granulated sugar
- 1/4 teaspoon salt
- 1/2 cup (1 stick) unsalted butter, cold and cubed
- 1 1/2 cups fresh or frozen blueberries fruit
- Zest of 1 lemon
- Juice of 1 lemon (about 3-4 tablespoons)
- 1/2 cup granulated sugar
- 2 large eggs
- 1/3 cup all-purpose flour
- 1/2 teaspoon baking powder
- A pinch of salt
- Powdered sugar for dusting (optional)
![]() Instruction For Lemon Blueberry Bars Recipe:
Instruction For Lemon Blueberry Bars Recipe:
- Preheat your oven to 350°F (175°C). Grease and line an 8x8-inch (20x20 cm) baking pan with parchment paper, leaving an overhang on two sides for easy removal.
- In a food processor or a large mixing bowl, combine the flour, granulated sugar, and salt for the crust. If using a food processor, pulse a few times to combine. If mixing by hand, use a pastry cutter or your fingers to blend the ingredients until you have coarse crumbs.
- Add the cold, cubed butter to the mixture. Pulse in the food processor or use your fingers to incorporate the butter into the dry ingredients until the mixture resembles coarse sand and can hold together when squeezed.
- Press the crust mixture firmly into the bottom of the prepared baking pan. Ensure it's evenly distributed and compacted.
- In a separate bowl, whisk together the eggs, lemon zest, lemon juice, and granulated sugar until well combined.
- In another bowl, whisk together the flour, baking powder, and a pinch of salt.
- Gradually add the dry ingredient mixture to the wet mixture, stirring until smooth.
- Gently fold in the blueberries fruit, being careful not to break them.
- Pour the lemon-blueberry recipe filling over the crust in the baking pan, spreading it out evenly.
- Bake in the preheated oven for 30-35 minutes or until the edges are golden brown and the center is set. You can do a toothpick test; it should come out clean or with just a few moist crumbs when inserted into the center.
- Remove the bars from the oven and allow them to cool completely in the pan.
- Once cooled, lift the bars out of the pan using the parchment paper overhang. Place them on a cutting board and cut into squares or rectangles.
- If desired, dust the tops of the bars with powdered sugar for a finishing touch.
- Serve and enjoy your delicious lemon-blueberry bars recipe!
Cherry Fruit Recipe
8)![]() Ingredients For Cherry Pie Recipe:
Ingredients For Cherry Pie Recipe:
For The Pie Crust:
- 2 1/2 cups all-purpose flour
- 1 teaspoon salt
- 1 cup (2 sticks) cold unsalted butter, cut into small cubes
- 6-8 tablespoons ice water
- 4 cups fresh or frozen pitted cherries fruit
- 1 cup granulated sugar
- 3 tablespoons cornstarch
- 1/4 teaspoon almond extract (optional)
- 1/4 teaspoon vanilla extract
- A pinch of salt
- 1 tablespoon unsalted butter (for dotting the filling)
- 1 egg, beaten (for egg wash)
- 1-2 tablespoons granulated sugar (for sprinkling on top)
![]() Instruction For Cherry Pie Recipe:
Instruction For Cherry Pie Recipe:
For The Pie Crust:
- In a large mixing bowl, combine the flour and salt.
- Add the cold butter cubes to the flour mixture. Use a pastry cutter, two knives, or your fingertips to work the butter into the flour until the mixture resembles coarse crumbs.
- Gradually add ice water, one tablespoon at a time, and mix with a fork until the dough just comes together. Be careful not to overmix.
- Divide the dough in half, shape each half into a disk, and wrap them in plastic wrap. Refrigerate for at least 30 minutes, or until the dough is firm.
- In a large mixing bowl, combine the pitted cherries fruit, sugar, cornstarch, almond extract (if using), vanilla extract, and a pinch of salt. Mix until the cherries fruit are well coated with the sugar and cornstarch mixture.
- Preheat your oven to 425°F (220°C).
- On a lightly floured surface, roll out one of the chilled pie crust disks into a circle large enough to fit your pie pan. Place it in the bottom of a 9-inch pie dish, and trim any excess dough hanging over the edges.
- Pour the cherry fruit filling into the pie crust.
- Dot the filling with small pieces of butter.
- Roll out the second pie crust disk into a circle and place it over the cherry fruit filling. Trim any excess dough, leaving about a 1-inch overhang.
- Fold the overhang of the top crust under the bottom crust, then crimp the edges to seal the pie.
- Cut a few slits in the top crust to allow steam to escape.
- Brush the top crust with the beaten egg and sprinkle with granulated sugar for a golden finish.
- Place the pie on a baking sheet (to catch any drips) and bake in the preheated oven for 45-55 minutes, or until the crust is golden brown and the filling is bubbly.
- Remove the pie from the oven and allow it to cool completely before serving.
- Slice and serve your homemade cherry pie recipe with a scoop of vanilla ice cream for a classic treat.
Coconut fruit Recipe
9)![]() Ingredients For Coconut Burfi Recipe:
Ingredients For Coconut Burfi Recipe:
- 2 cups desiccated coconut fruit (unsweetened)
- 1 cup granulated sugar
- 1/2 cup water
- 1/4 teaspoon cardamom powder (optional, for flavor)
- A pinch of saffron strands (optional, for color and flavor)
- 2 tablespoons ghee (clarified butter)
- Chopped nuts (like cashews or almonds) for garnish (optional)
![]() Instruction For Coconut Burfi Recipe:
Instruction For Coconut Burfi Recipe:
- Grease a plate or a tray with a little ghee and set it aside. This will be used to set the burfi.
- In a heavy-bottomed pan, add the sugar and water. Heat over medium heat while stirring until the sugar dissolves.
- Once the sugar has dissolved, add the desiccated coconut fruit to the pan. Stir well to combine the sugar and coconut.
- Continue cooking the mixture over medium heat, stirring constantly to prevent sticking or burning. The mixture will start to thicken.
- If using, add the saffron strands and cardamom powder at this stage for added flavor. Continue cooking and stirring.
- As you cook, the mixture will start to leave the sides of the pan. It will become thicker and will come together as a mass. This should take about 10-15 minutes.
- Add the ghee to the mixture and stir well. The ghee will give the burfi a nice sheen and enhance the flavor.
- Once the mixture has thickened and starts to leave the sides of the pan, remove it from the heat immediately.
- Transfer the hot mixture onto the greased plate or tray. Use a greased spatula or the back of a spoon to spread it evenly into a square or rectangular shape, about 1/2 to 3/4 inch in thickness.
- If using, sprinkle the chopped nuts on top of the burfi and gently press them into the surface.
- Allow the coconut burfi recipe to cool and set at room temperature for a couple of hours. You can also refrigerate it to speed up the setting process.
- Once the burfi recipe has cooled and set completely, use a sharp knife to cut it into squares or diamond shapes.
- Your homemade coconut burfi recipe is ready to be enjoyed! Store it in an airtight container at room temperature.
Cranberry Fruit Recipe
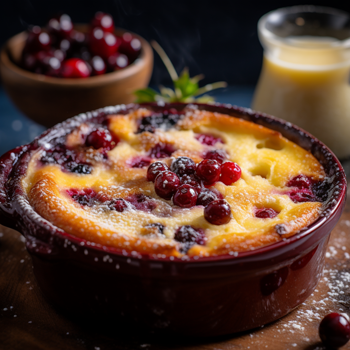
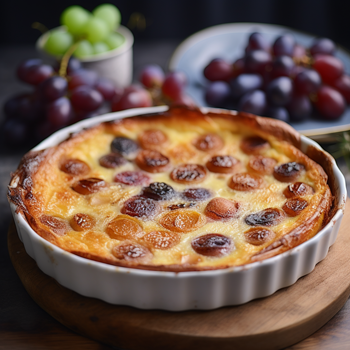
10)![]() Ingredients For Cranberry Clafouti Recipe:
Ingredients For Cranberry Clafouti Recipe:
- 1 1/2 cups fresh cranberries fruit
- 1/2 cup granulated sugar
- 1/2 cup all-purpose flour
- 3 large eggs
- 1 cup milk
- 1 teaspoon vanilla extract
- 1/4 teaspoon almond extract (optional, for extra flavor)
- A pinch of salt
- Powdered sugar for dusting (optional)
- Butter or cooking spray for greasing the baking dish
![]() Instruction For Cranberry Clafouti Recipe:
Instruction For Cranberry Clafouti Recipe:
- Preheat your oven to 350°F (175°C). Grease a 9-inch (23 cm) pie dish or baking dish with butter or cooking spray.
- Rinse and dry the cranberries fruit. Spread them evenly in the greased baking dish.
- Sprinkle 1/4 cup of granulated sugar over the cranberries fruit to sweeten them. You can adjust the amount of sugar depending on your preference and the tartness of the cranberries fruit.
- In a mixing bowl, whisk together the remaining 1/4 cup of granulated sugar, flour, and a pinch of salt.
- In another bowl, beat the eggs. Add the milk, vanilla extract, and almond extract (if using), and mix well.
- Gradually add the wet mixture to the dry mixture, stirring until you have a smooth batter.
- Pour the batter over the cranberries fruit in the baking dish.
- Place the dish in the preheated oven and bake for about 40-45 minutes, or until the clafouti is puffed, golden brown, and set in the center. It should have a custardy texture.
- Remove the cranberry clafouti recipe from the oven and let it cool for a few minutes.
- If desired, dust the top with powdered sugar for a decorative touch.
- Serve the cranberry clafouti recipe warm. It's delicious on its own or with a dollop of whipped cream or a scoop of vanilla ice cream.
Curuba Fruit Recipe
11)![]() Ingredients For Curuba Pudding Recipe:
Ingredients For Curuba Pudding Recipe:
- 2 ripe curubas fruit (banana passionfruits)
- 1/2 cup granulated sugar
- 2 tablespoons cornstarch
- 2 cups milk (whole or any milk of your choice)
- 3 large egg yolks
- 1 teaspoon vanilla extract
- Pinch of salt
- Fresh curuba seeds or slices for garnish (optional)
![]() Instruction For Curuba Pudding Recipe:
Instruction For Curuba Pudding Recipe:
- Wash the curubas fruit thoroughly and cut them in half lengthwise. Scoop out the pulp and seeds with a spoon. Place the pulp in a bowl and set it aside.
- In a separate bowl, whisk together the sugar and cornstarch until well combined.
- In a medium-sized saucepan, heat the milk over medium heat until it's hot but not boiling. Remove it from the heat once it starts to steam.
- While the milk is heating, add the egg yolks to the sugar and cornstarch mixture. Whisk them together until the mixture becomes smooth and creamy.
- Gradually pour the hot milk into the egg yolk mixture, whisking continuously to combine. This is called tempering and helps prevent the eggs from curdling.
- Pour the milk and egg mixture back into the saucepan and return it to the stove over medium heat.
- Cook the mixture, stirring constantly, until it thickens and comes to a gentle boil. This should take about 5-7 minutes. Make sure to keep stirring to prevent lumps from forming.
- Once the mixture has thickened, remove it from the heat and stir in the vanilla extract and a pinch of salt.
- Add the curuba pulp to the pudding mixture and stir until it's well incorporated.
- Allow the curuba pudding recipe to cool for a few minutes, then transfer it into serving dishes or bowls.
- Cover the dishes with plastic wrap, placing the plastic directly on the surface of the pudding to prevent a skin from forming.
- Refrigerate the pudding for at least 2-3 hours or until it's well chilled and set.
- Before serving, you can garnish the curuba pudding recipe with fresh curuba seeds or slices for added flavor and presentation.
Dragon Fruit Recipe
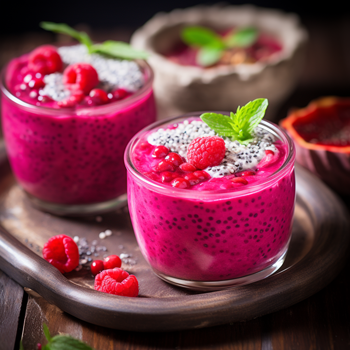
12)![]() Ingredients For Dragon Fruit Chia Pudding Recipe:
Ingredients For Dragon Fruit Chia Pudding Recipe:
- 1 ripe dragon fruit (red or white flesh)
- 2 tablespoons chia seeds
- 1 cup coconut milk (or any milk of your choice)
- 1-2 tablespoons honey or maple syrup (adjust to taste)
- 1/2 teaspoon vanilla extract (optional)
- Fresh berries or additional dragon fruit for garnish (optional)
![]() Instruction For Dragon Fruit Chia Pudding Recipe:
Instruction For Dragon Fruit Chia Pudding Recipe:
- Cut the dragon fruit in half and scoop out the flesh. Reserve a small amount of dragon fruit flesh for garnish if desired.
- In a blender, combine the dragon fruit flesh, coconut milk, honey or maple syrup, and vanilla extract (if using). Blend until you have a smooth and vibrant pink mixture.
- In a bowl, add the chia seeds.
- Pour the dragon fruit mixture from the blender over the chia seeds.
- Stir the mixture thoroughly to ensure the chia seeds are evenly distributed.
- Cover the bowl and refrigerate it for at least 2-3 hours or overnight. During this time, the chia seeds will absorb the liquid and thicken the pudding.
- After the chia pudding has set, give it a good stir to break up any clumps and achieve a creamy consistency.
- If you find the pudding is too thick, you can add a little more coconut milk to reach your desired thickness.
- Serve the dragon fruit chia pudding recipe in bowls or glasses. Top it with fresh berries, additional dragon fruit pieces, or your favorite toppings for added flavor and texture.
- Enjoy your homemade dragon fruit chia pudding recipe as a healthy and visually stunning treat for breakfast, dessert, or a snack!
Durian Fruit Recipe
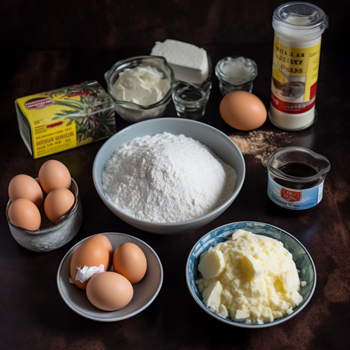
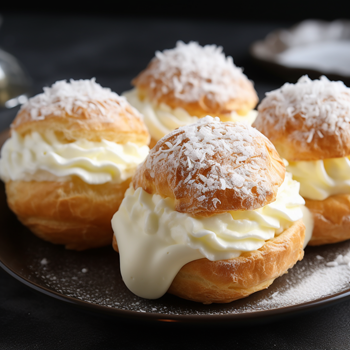
13)![]() Ingredients For Durian Cream Puff Recipe:
Ingredients For Durian Cream Puff Recipe:
For The Choux Pastry (Cream Puff Shells):
- 1/2 cup (1 stick) unsalted butter
- 1 cup water
- 1 cup all-purpose flour
- 1/4 teaspoon salt
- 4 large eggs
- 1 cup durian fruit flesh, fresh or frozen (thawed)
- 1/2 cup heavy cream
- 1/4 cup powdered sugar (adjust to taste)
- 1 teaspoon vanilla extract
- 1/2 cup durian fruit flesh, fresh or frozen (thawed)
- 1/4 cup powdered sugar (adjust to taste)
![]() Instruction For Durian Cream Puff Recipe:
Instruction For Durian Cream Puff Recipe:
For The Choux Pastry (Cream Puff Shells):
- Preheat your oven to 400°F (200°C). Line a baking sheet with parchment paper.
- In a saucepan over medium heat, combine the water and butter. Bring to a boil until the butter is completely melted.
- Remove the saucepan from the heat and quickly stir in the flour and salt until the mixture forms a smooth ball of dough.
- Transfer the dough to a mixing bowl and let it cool for a few minutes.
- Add the eggs, one at a time, mixing well after each addition. The dough should become smooth and glossy.
- Using a piping bag or two spoons, drop small mounds of dough onto the prepared baking sheet, spacing them about 2 inches apart.
- Bake in the preheated oven for 20-25 minutes or until the cream puffs are puffed up and golden brown. Do not open the oven door during the first 15 minutes of baking to prevent them from deflating.
- Remove the cream puffs recipe from the oven and let them cool completely on a wire rack.
- In a blender or food processor, combine the durian fruit flesh, heavy cream, powdered sugar, and vanilla extract.
- Blend until you have a smooth and creamy durian fruit filling. Adjust the sweetness by adding more powdered sugar if needed.
- Transfer the durian fruit cream filling into a piping bag fitted with a small tip.
- Once the cream puffs have cooled completely, use a small knife or a pastry tip to create a small hole in the bottom of each puff.
- Pipe the durian cream filling into each puff until they are well filled.
- Optionally, you can prepare a durian fruit glaze by blending 1/2 cup of durian flesh with powdered sugar. Drizzle this glaze over the cream puffs for extra durian fruit flavor.
- Serve your homemade durian cream puffs recipe immediately and enjoy the unique and rich taste of durian!
Emu Apple Fruit Recipe
14)![]() Ingredients For Emu Apple Pudding Recipe:
Ingredients For Emu Apple Pudding Recipe:
For The Emu Apple (Muntries) Filling:
- 1 1/2 cups fresh or frozen emu apples fruit (muntries)
- 1/2 cup granulated sugar
- 1/2 cup water
- 1 cup all-purpose flour
- 1/2 cup granulated sugar
- 1 1/2 teaspoons baking powder
- 1/2 teaspoon salt
- 1/2 cup milk
- 2 tablespoons unsalted butter melted.
- 1 teaspoon vanilla extract
![]() Instruction For Emu Apple Pudding Recipe:
Instruction For Emu Apple Pudding Recipe:
For The Emu Apple (Muntries) Filling:
- If using fresh emu apples (muntries)fruit, rinse them thoroughly and remove any stems.
- In a saucepan, combine the emu apples fruit, granulated sugar, and water.
- Bring the mixture to a simmer over medium heat, stirring occasionally.
- Let it simmer for about 5-10 minutes, or until the emu apples fruit are tender and the mixture thickens slightly.
- Remove the emu apple fruit filling from the heat and set it aside to cool.
- Preheat your oven to 350°F (175°C). Grease a baking dish or individual ramekins.
- In a mixing bowl, whisk together the flour, granulated sugar, baking powder, and salt.
- In another bowl, combine the milk, melted butter, and vanilla extract.
- Gradually add the wet ingredients to the dry ingredients, stirring until you have a smooth batter.
- Spoon the emu apple fruit filling into the prepared baking dish or ramekins.
- Pour the pudding batter over the emu apple fruit filling. Spread it out evenly.
- Bake in the preheated oven for about 30-35 minutes (less if using individual ramekins), or until the top is golden brown and the pudding is cooked through. It should be set and springy to the touch.
- Remove the pudding recipe from the oven and let it cool for a few minutes before serving.
- Serve your Emu Apple (Muntries) Pudding recipe warm, optionally with a scoop of vanilla ice cream or a dollop of whipped cream for added indulgence.
Fig Fruit Recipe
15)![]() Ingredients For Fig And Caramel Nuts Tart Recipe:
Ingredients For Fig And Caramel Nuts Tart Recipe:
For The Tart Crust:
- 1 1/4 cups all-purpose flour
- 1/4 cup granulated sugar
- 1/2 teaspoon salt
- 1/2 cup (1 stick) unsalted butter, cold and cut into small cubes.
- 1 large egg yolk
- 2 tablespoons ice water
- 1 cup granulated sugar
- 1/4 cup water
- 1/2 cup heavy cream
- 1 1/2 cups mixed nuts (e.g., almonds, pecans, walnuts), toasted and roughly chopped.
- 1 teaspoon vanilla extract
- Pinch of salt
- 10-12 fresh figs fruit stemmed and quartered.
- Honey, for drizzling (optional)
- Powdered sugar, for dusting (optional)
![]() Instruction For Fig And Caramel Nuts Tart Recipe:
Instruction For Fig And Caramel Nuts Tart Recipe:
For The Tart Crust:
- In a food processor, combine the flour, sugar, and salt. Pulse a few times to mix.
- Add the cold, cubed butter to the food processor and pulse until the mixture resembles coarse crumbs.
- In a small bowl, whisk together the egg yolk and ice water.
- With the food processor running, gradually pour the egg yolk mixture through the feed tube until the dough comes together. Be careful not to overmix.
- Turn the dough out onto a lightly floured surface and knead it a few times to bring it together. Shape it into a disk, wrap it in plastic wrap, and refrigerate for at least 30 minutes.
- Preheat your oven to 350°F (175°C).
- In a heavy-bottomed saucepan, combine the granulated sugar and water over medium heat. Stir until the sugar dissolves, then stop stirring and let the mixture come to a boil.
- Continue cooking, swirling the pan occasionally, until the sugar syrup turns a deep amber color. This should take about 8-10 minutes.
- Remove the saucepan from heat and carefully add the heavy cream while stirring constantly. Be cautious as the mixture will bubble up.
- Return the caramel recipe mixture to low heat and stir until smooth. Remove it from the heat and let it cool for a few minutes.
- Stir in the toasted and chopped nuts, vanilla extract, and a pinch of salt. Set the caramel nut filling recipe aside.
- On a lightly floured surface, roll out the chilled tart dough into a circle large enough to line a 9-inch tart pan.
- Gently press the dough into the tart pan, trimming any excess. Prick the bottom of the crust with a fork to prevent it from puffing up while baking.
- Pour the caramel nut filling into the prepared tart shell.
- Arrange the fresh fig fruit quarters on top of the caramel nut filling.
- Bake in the preheated oven for 25-30 minutes, or until the tart is golden brown and the caramel is bubbling.
- Remove the tart from the oven and let it cool for a while.
- Optionally, drizzle honey over the top of the tart for added sweetness and dust with powdered sugar for a decorative touch.
- Slice and serve your fig and caramel nut tart recipe, either warm or at room temperature. Enjoy!
Grapes Fruit Recipe
16)![]() Ingredients For Grapes Clafoutis Recipe:
Ingredients For Grapes Clafoutis Recipe:
- 2 cups seedless grapesfruit (red or green) washed, and stems removed.
- 1/2 cup granulated sugar
- 1/2 cup all-purpose flour
- A pinch of salt
- 3 large eggs
- 1 cup milk
- 1 teaspoon vanilla extract
- Powdered sugar, for dusting (optional)
![]() Instruction For Grapes Clafoutis Recipe:
Instruction For Grapes Clafoutis Recipe:
- Preheat your oven to 350°F (175°C). Grease a 9-inch (23 cm) pie dish or baking dish.
- Place the washed and stemmed grapes fruit in a single layer in the prepared dish.
- In a mixing bowl, whisk together the granulated sugar, all-purpose flour, and a pinch of salt.
- In another bowl, beat the eggs. Add the milk and vanilla extract, and mix well.
- Gradually add the wet ingredients to the dry ingredients, whisking until you have a smooth batter.
- Pour the batter evenly over the grapes fruit in the baking dish.
- Bake in the preheated oven for about 35-40 minutes, or until the clafouti is puffed, golden brown, and set in the center. It should have a custardy texture.
- Remove the grape clafouti recipe from the oven and let it cool for a few minutes.
- If desired, dust the top with powdered sugar for a decorative touch.
- Serve your grape clafouti recipe warm or at room temperature. It's a delicious treat on its own or with a scoop of vanilla ice cream or a dollop of whipped cream for added indulgence.
GrapeFruit Fruit Recipe
17)![]() Ingredients For Ruby Red Grapefruit Bars Recipe:
Ingredients For Ruby Red Grapefruit Bars Recipe:
For The Crust:
- 1 1/2 cups all-purpose flour
- 1/2 cup powdered sugar
- 1/4 teaspoon salt
- 3/4 cup (1 1/2 sticks) unsalted butter, cold and cubed
- 2 cups granulated sugar
- 1/4 cup all-purpose flour
- 1/4 teaspoon salt
- 4 large eggs
- 2/3 cup freshly squeezed ruby red grapefruit fruit juice (from about 2 grapefruits)
- 2 tablespoons ruby red grapefruit zest (from the same grapefruits)
- Powdered sugar, for dusting
![]() Instruction For Ruby Red Grapefruit Bars Recipe:
Instruction For Ruby Red Grapefruit Bars Recipe:
For The Crust:
- Preheat your oven to 350°F (175°C). Grease a 9x9-inch (23x23 cm) baking pan or line it with parchment paper, leaving an overhang on two sides for easy removal.
- In a food processor, combine the all-purpose flour, powdered sugar, and salt. Pulse to mix.
- Add the cold, cubed butter to the food processor. Pulse until the mixture resembles coarse crumbs and begins to come together.
- Press the crust mixture evenly into the bottom of the prepared baking pan.
- Bake the crust in the preheated oven for about 20-25 minutes or until it's lightly golden brown. Remove it from the oven and set it aside.
- In a mixing bowl, whisk together the granulated sugar, all-purpose flour, and salt.
- Add the eggs and whisk until well combined.
- Stir in the freshly squeezed grapefruit fruit juice and grapefruit zest.
- Pour the grapefruit fruit filling over the baked crust.
- Bake in the oven for about 25-30 minutes, or until the filling is set and the edges are lightly golden brown. The center should still have a slight jiggle when gently shaken.
- Remove the grapefruit bars recipe from the oven and let them cool to room temperature in the baking pan.
- Once cooled, refrigerate the bars for at least 2 hours to firm up before cutting.
- Use the parchment paper overhang to lift the bars out of the pan. Place them on a cutting board and cut into squares or rectangles.
- Dust the tops of the bars with powdered sugar just before serving for a finished touch.
- Serve your Ruby Red Grapefruit Bars recipe chilled and enjoy the sweet-tart citrus goodness!
Guava Fruit Recipe
18)![]() Ingredients For Guava Cheese Recipe:
Ingredients For Guava Cheese Recipe:
- 4 ripe guavas fruit
- 1 cup granulated sugar
- 1/4 cup water
- 1/2 teaspoon lemon juice (optional, for tartness)
- 1/2 teaspoon vanilla extract (optional, for flavor)
![]() Instruction For Guava Cheese Recipe:
Instruction For Guava Cheese Recipe:
- Wash the guavas fruit thoroughly, cut off the ends, and slice them in half.
- Scoop out the seeds and any hard parts from the center of the guavas fruit. You should have a bowl of guava pulp.
- Puree the guava fruit pulp in a blender or food processor until smooth. If the puree is too thick, you can add a little water to help with the blending process.
- Pass the guava fruit puree through a fine-mesh strainer or sieve into a large, heavy-bottomed saucepan to remove any seeds or fibers. This will ensure a smooth guava paste.
- In the saucepan, combine the guava fruit puree, granulated sugar, and water. If you'd like a slightly tart flavor, add the lemon juice. If you want a hint of vanilla flavor, add the vanilla extract.
- Place the saucepan over medium heat and stir continuously to combine the ingredients.
- Cook the mixture, stirring frequently, over medium-low to medium heat. It will start to thicken and turn into a reddish paste. This process can take 30 minutes to 1 hour, depending on the moisture content of your guavas fruit.
- As the mixture thickens, reduce the heat to low and continue cooking, stirring constantly to prevent it from sticking to the bottom of the saucepan. The guava paste recipe is ready when it becomes very thick and pulls away from the sides of the pan. It should hold its shape and have a shiny appearance.
- Remove the guava cheese recipe from the heat and let it cool for a few minutes.
- While it's still warm, transfer the guava paste to a square or rectangular dish lined with parchment paper. Smooth the top with a spatula.
- Allow the guava cheese recipe to cool completely at room temperature.
- Once cooled and set, you can cut it into squares, rectangles, or any desired shape.
- Store your homemade guava cheese recipe in an airtight container at room temperature or in the refrigerator for longer shelf life.
Huckleberry Fruit Recipe
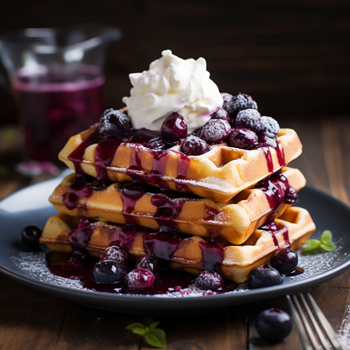
19)![]() Ingredients For Huckleberry Waffles Recipe:
Ingredients For Huckleberry Waffles Recipe:
- 2 cups all-purpose flour
- 2 tablespoons granulated sugar
- 1 tablespoon baking powder
- 1/2 teaspoon salt
- 2 large eggs
- 1 3/4 cups milk
- 1/2 cup unsalted butter, melted
- 1 teaspoon vanilla extract
- 1 cup fresh or frozen huckleberries fruit(if using frozen, do not thaw)
![]() Instruction For Huckleberry Waffles Recipe:
Instruction For Huckleberry Waffles Recipe:
- Preheat your waffle recipe iron according to the manufacturer's instructions.
- In a large mixing bowl, whisk together the all-purpose flour, granulated sugar, baking powder, and salt.
- In a separate bowl, beat the eggs.
- Add the milk, melted butter, and vanilla extract to the beaten eggs and whisk until well combined.
- Pour the wet ingredients into the dry ingredients and stir until the batter is just combined. It's okay if there are a few lumps.
- Gently fold in the huckleberries fruit. Be careful not to overmix, as this can break the huckleberries and turn the batter purple.
- Lightly grease the waffle iron with cooking spray or a small amount of melted butter.
- Pour the waffle batter onto the preheated waffle iron according to the manufacturer's instructions. The amount of batter you need will depend on the size of your waffle iron.
- Close the waffle iron and cook until the waffles are golden brown and crisp. Cooking times may vary depending on your waffle iron, but it typically takes about 3-5 minutes.
- Carefully remove the huckleberry waffles recipe from the iron and serve them immediately.
- You can keep the cooked waffles warm in a low oven (around 200°F or 93°C) while you cook the remaining waffles.
- Serve your huckleberry waffles recipe with your favorite toppings, such as maple syrup, whipped cream, or additional fresh huckleberries fruit.
Honeydew Fruit Recipe
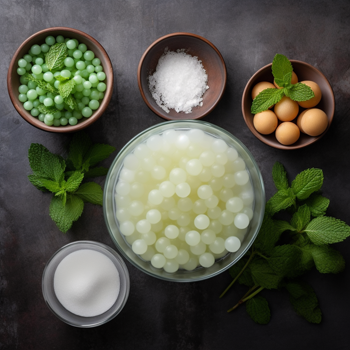
20)![]() Ingredients For Honeydew Sago Recipe:
Ingredients For Honeydew Sago Recipe:
- 1 cup small sago pearls (you can find them in most Asian grocery stores)
- 1/2 honeydew melon fruit
- 1/2 cup granulated sugar (adjust to taste)
- 1 1/2 cups coconut milk
- 1/2 cup water
- Ice cubes (optional)
- Fresh mint leaves for garnish (optional)
![]() Instruction For Honeydew Sago Recipe:
Instruction For Honeydew Sago Recipe:
For Preparing The Sago Pearls:
- Rinse the sago pearls recipe under cold running water in a fine-mesh strainer to remove excess starch.
- Bring a pot of water to a boil. Once boiling, add the rinsed sago pearls to the boiling water.
- Cook the sago pearls over medium heat for about 10-15 minutes, or until they become translucent with a small white dot in the center. Stir occasionally to prevent them from sticking together.
- Once cooked, remove the sago pearls from heat and rinse them under cold water to stop the cooking process.
- Drain the sago pearls and set them aside.
- Cut the honeydew melon fruit in half and remove the seeds.
- Use a melon baller or a spoon to scoop out the honeydew fruit flesh into small, bite-sized melon balls. Set aside.
- In a saucepan, combine the coconut milk, water, and granulated sugar. Heat the mixture over low heat, stirring constantly until the sugar has dissolved. Be careful not to let it boil.
- Once the sugar is dissolved, remove the saucepan from the heat and let the coconut milk mixture cool to room temperature.
- In serving bowls or glasses, divide the cooked sago pearls and honeydew melon balls.
- Pour the cooled coconut milk mixture over the sago pearls and honeydew.
- If desired, add ice cubes to each serving for extra chill.
- Garnish with fresh mint leaves for a refreshing touch.
- Serve your homemade honeydew sago recipe chilled and enjoy the sweet and creamy goodness.
Ice Apple Fruit Recipe
21)![]() Ingredients For Ice Apple Kheer Recipe:
Ingredients For Ice Apple Kheer Recipe:
- 1 cup tender ice apple fruit (palm fruit or tadgola), peeled and chopped
- 1 liter full-fat milk
- 1/2 cup sugar (adjust to taste)
- 1/2 teaspoon cardamom powder
- 2 tablespoons chopped nuts (almonds, cashews, pistachios), lightly toasted
- 1 tablespoon raisins (optional)
- A pinch of saffron strands (optional)
- A few ice apple fruit slices for garnish (optional)
![]() Instruction For Ice Apple Kheer Recipe:
Instruction For Ice Apple Kheer Recipe:
- Begin by preparing the ice apple fruit (palm fruit). Peel and chop the tender ice apple fruit into small pieces. Remove any seeds or tough fibers if present.
- In a heavy-bottomed pan, bring the full-fat milk to a boil over medium heat. Stir occasionally to prevent it from sticking to the bottom of the pan.
- Once the milk comes to a boil, reduce the heat to low and let it simmer. Continue to simmer the milk, stirring frequently, until it reduces to about half its original quantity. This process can take 30-45 minutes.
- Add the sugar to the simmering milk and stir until the sugar is completely dissolved.
- Add the chopped ice apple fruit pieces to the milk and simmer for an additional 5-7 minutes. Stir gently to combine the ice apple fruit with the milk.
- If using saffron, soak a pinch of saffron strands in a tablespoon of warm milk for a few minutes. Then, add the saffron milk to the kheer for a delicate saffron flavor and a beautiful color.
- Stir in the cardamom powder and continue to cook for another 2-3 minutes.
- Turn off the heat and let the ice apple kheer recipe cool to room temperature.
- Once the kheer has cooled, refrigerate it for at least a couple of hours to chill.
- Before serving, garnish the ice apple kheer with chopped toasted nuts, raisins (if using), and a few ice apple slices.
- Serve the ice apple kheer recipe chilled, and enjoy the refreshing and creamy dessert.
JackFruit Fruit Recipe
22)![]() Ingredients For Jackfruit Burfi Recipe:
Ingredients For Jackfruit Burfi Recipe:
- 2 cups ripe jackfruit fruit pulp (from about 10-12 pieces of jackfruit)
- 1 cup granulated sugar (adjust to taste)
- 1/4 cup ghee (clarified butter)
- 1/2 cup milk powder
- 1/2 teaspoon cardamom powder
- A pinch of saffron strands (optional)
- Chopped nuts for garnish (e.g., almonds, cashews, pistachios)
![]() Instruction For Jackfruit Burfi Recipe:
Instruction For Jackfruit Burfi Recipe:
- Start by extracting the pulp from the ripe jackfruits fruit. Remove the seeds and chop the flesh into small pieces. Then, blend or mash the pieces into a smooth pulp. You should have about 2 cups of jackfruit fruit pulp.
- In a heavy-bottomed pan or kadai, heat the ghee over medium-low heat.
- Add the jackfruit fruit pulp to the pan and sauté it in the ghee for about 10-15 minutes. Keep stirring continuously to prevent it from sticking to the pan and to remove any excess moisture.
- After sautéing, add the sugar to the pan and mix well with the jackfruit fruit pulp.
- Continue to cook the mixture on low heat, stirring frequently. The sugar will melt and combine with the jackfruit pulp. The mixture will start to thicken.
- Add the milk powder to the pan and stir it into the mixture. The milk powder helps to bind the burfi.
- Keep stirring and cooking until the mixture thickens further and begins to leave the sides of the pan. This process can take about 20-25 minutes.
- Add the cardamom powder and saffron strands (if using) to the mixture and mix well. The saffron adds a beautiful color and aroma to the burfi recipe.
- Once the mixture has thickened and comes together into a mass, transfer it to a greased or parchment-lined tray or plate. Use a spatula to flatten and shape it evenly.
- While the mixture is still warm, garnish the top with chopped nuts of your choice, pressing them gently into the surface.
- Allow the jackfruit burfi recipe to cool completely at room temperature. Once it has set, you can refrigerate it for a few hours to make it easier to cut into squares or diamond shapes.
- Cut the burfi recipe into pieces and serve.
Kiwi Fruit Recipe
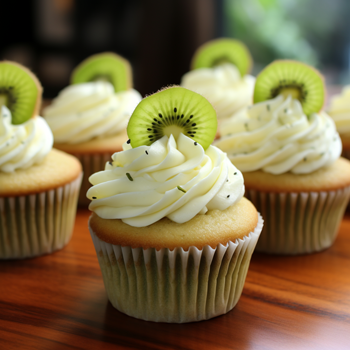
23)![]() Ingredients For Kiwi Cupcake Recipe:
Ingredients For Kiwi Cupcake Recipe:
For The Cupcakes:
- 1 1/2 cups all-purpose flour
- 1 1/2 teaspoons baking powder
- 1/4 teaspoon baking soda
- 1/4 teaspoon salt
- 1/2 cup unsalted butter, softened
- 1 cup granulated sugar
- 2 large eggs
- 2 ripe kiwis fruit, peeled and mashed (about 1/2 cup)
- 1 teaspoon vanilla extract
- 1/2 cup buttermilk
- 1/2 cup unsalted butter, softened
- 2 ripe kiwis fruit, peeled and mashed (about 1/2 cup)
- 4 cups powdered sugar
- Green food coloring (optional, for a brighter color)
- Kiwi slices or zest for garnish (optional)
![]() Instruction For Kiwi Cupcake Recipe:
Instruction For Kiwi Cupcake Recipe:
For The Cupcakes:
- Preheat your oven to 350°F (175°C). Line a muffin tin with cupcake liners.
- In a mixing bowl, whisk together the all-purpose flour, baking powder, baking soda, and salt. Set this dry mixture aside.
- In another bowl, cream together the softened butter and granulated sugar until light and fluffy, which usually takes about 2-3 minutes.
- Add the eggs, one at a time, beating well after each addition.
- Mix in the mashed kiwis and vanilla extract until well combined.
- Gradually add the dry mixture to the wet mixture, alternating with buttermilk, beginning and ending with the dry ingredients. Mix until just combined. Be careful not to overmix.
- Spoon the cupcake batter into the prepared muffin tin, filling each cup about 2/3 full.
- Bake in the preheated oven for 18-20 minutes, or until a toothpick inserted into the center of a cupcake comes out clean.
- Remove the cupcakes recipe from the oven and let them cool in the muffin tin for a few minutes before transferring them to a wire rack to cool completely.
- In a blender or food processor, puree the mashed kiwis fruit until smooth.
- In a mixing bowl, beat the softened butter until creamy.
- Gradually add the powdered sugar and continue to beat until well combined.
- Mix in the kiwi fruit puree and a few drops of green food coloring (if desired) to achieve the desired color and flavor. Adjust the consistency by adding more powdered sugar if needed.
- Once the cupcakes are completely cooled, frost them with the kiwi buttercream using a piping bag or a spatula.
- Garnish each cupcake with a kiwi slice recipe or a sprinkle of kiwi zest for a fresh and colorful touch.
- Serve and enjoy your homemade kiwi cupcakes recipe!
Lemon Fruit Recipe
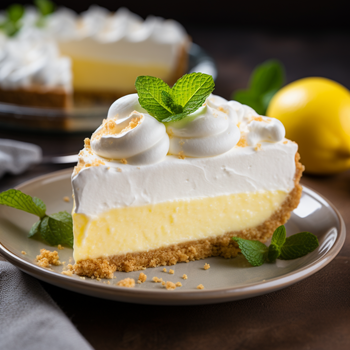
24)![]() Ingredients For Lemon Icebox Pie Recipe:
Ingredients For Lemon Icebox Pie Recipe:
For the Graham Cracker Crust:
- 1 1/2 cups graham cracker crumbs (about 12 graham crackers)
- 1/4 cup granulated sugar
- 1/2 cup unsalted butter, melted
- 1 (14-ounce) can sweetened condensed milk
- 3 large egg yolks
- 1/2 cup fresh lemon fruit juice (about 3-4 lemons)
- 1 tablespoon grated lemon zest
- 1 cup heavy whipping cream
- 2 tablespoons powdered sugar
- 1 teaspoon vanilla extract
![]() Instruction For Lemon Icebox Pie Recipe:
Instruction For Lemon Icebox Pie Recipe:
For the Graham Cracker Crust:
- In a food processor, pulse the graham crackers until they become fine crumbs. If you don't have a food processor, you can place the graham crackers in a plastic bag and crush them with a rolling pin.
- In a mixing bowl, combine the graham cracker crumbs, granulated sugar, and melted butter. Mix until the crumbs are evenly coated with the butter.
- Press the mixture firmly into the bottom and up the sides of a 9-inch (23 cm) pie dish to form the crust. You can use the back of a spoon or a measuring cup to help pack it down evenly.
- Place the crust in the refrigerator while you prepare the filling.
- In a mixing bowl, whisk together the sweetened condensed milk, egg yolks, lemon juice, and lemon zest until well combined.
- Pour the lemon fruit filling into the prepared graham cracker crust.
- Smooth the top with a spatula to ensure it's evenly distributed.
- Refrigerate the pie for at least 4 hours or until it's fully set. It's even better if you can refrigerate it overnight.
- In a mixing bowl, whip the heavy whipping cream, powdered sugar, and vanilla extract until stiff peaks form. You can use a hand mixer or stand mixer for this.
- Spread the whipped cream over the chilled lemon filling in the pie crust recipe.
- Optionally, you can garnish with additional lemon zest or thin lemon slices for a decorative touch.
- Slice and serve your delicious homemade lemon icebox pie recipe chilled.
Longan Fruit Recipe
25)![]() Ingredients For Longan Raw Cheesecake Recipe:
Ingredients For Longan Raw Cheesecake Recipe:
For The Crust:
- 1 cup raw almonds
- 1 cup pitted dates
- A pinch of salt
- 2 cups raw cashews (soaked in water for at least 4 hours or overnight, then drained)
- 1/2 cup longan fruit (fresh or canned), drained and pitted
- 1/2 cup coconut cream
- 1/2 cup coconut oil, melted
- 1/2 cup agave syrup or maple syrup (adjust to taste)
- Juice of 2 lemons
- 1 teaspoon vanilla extract
- Fresh longan fruit for decoration (optional)
![]() Instruction For Longan Raw Cheesecake Recipe:
Instruction For Longan Raw Cheesecake Recipe:
For The Crust:
- In a food processor, combine the raw almonds, pitted dates, and a pinch of salt.
- Pulse the mixture until the almonds and dates are finely chopped, and the mixture sticks together when pressed between your fingers.
- Press the crust mixture firmly into the bottom of a lined 8-inch (20 cm) springform pan. Use the back of a spoon or the bottom of a glass to create an even and compact crust layer.
- Place the crust recipe in the refrigerator while you prepare the filling.
- In a high-speed blender, combine the soaked and drained raw cashews, longan fruit, coconut cream, melted coconut oil, agave syrup, lemon juice, and vanilla extract.
- Blend the mixture on high until it becomes completely smooth and creamy. This may take a few minutes, and you may need to stop and scrape down the sides of the blender to ensure all the ingredients are well combined.
- Taste the filling and adjust the sweetness or tartness by adding more agave syrup or lemon juice, if needed.
- Pour the longan cheesecake recipe filling onto the prepared crust in the springform pan.
- Smooth the top with a spatula to create an even surface.
- Cover the pan with plastic wrap or foil and place it in the freezer to set for at least 4-6 hours or until it's firm.
- Before serving, let the cheesecake sit at room temperature for about 10-15 minutes to soften slightly.
- Remove the cheesecake from the springform pan and decorate the top with fresh longan fruit if desired.
- Slice the Longan Raw Cheesecake recipe into wedges, serve, and enjoy!
Lychee Fruit Recipe
26)![]() Ingredients For Lychee Pudding Recipe:
Ingredients For Lychee Pudding Recipe:
For The Lychee Pudding:
- 1 can (20 ounces) of lychee fruit in syrup
- 2 cups of whole milk
- 1/2 cup of granulated sugar
- 1/4 cup of cornstarch
- 1/4 cup of cold water
- 1 teaspoon of vanilla extract
- Fresh lychee fruit
- Whipped cream
- Mint leaves
![]() Instruction For Lychee Pudding Recipe:
Instruction For Lychee Pudding Recipe:
- Open the can of lychee fruit and drain the syrup into a separate bowl. Set aside the lychee fruit.
- In a saucepan, combine the granulated sugar and cornstarch. Gradually whisk in the cold water until the mixture is smooth.
- Pour the milk into the saucepan with the sugar and cornstarch mixture. Whisk well to combine.
- Place the saucepan over medium heat and cook, stirring constantly, until the mixture thickens and comes to a boil. This should take about 5-7 minutes.
- Once the pudding has thickened, remove it from the heat. Stir in the lychee syrup (from the can of lychee fruit) and vanilla extract. Mix well to combine.
- Divide the drained lychee fruit among serving bowls or glasses. Pour the pudding mixture over the lychee fruit.
- Allow the lychee pudding to cool at room temperature for a bit, then cover each serving with plastic wrap or a lid and refrigerate for at least 2 hours, or until the pudding has set and is cold.
- Just before serving, you can garnish your lychee pudding recipe with fresh lychee fruit, a dollop of whipped cream, and a sprig of mint leaves for added freshness and presentation.
- Enjoy your homemade lychee pudding recipe as a delightful and refreshing dessert!
Mandarin Orange Fruit Recipe
27)![]() Ingredients For Mandarin Orange Muffins And Greek Yogurt Recipe:
Ingredients For Mandarin Orange Muffins And Greek Yogurt Recipe:
For the Muffins:
- 1 1/2 cups all-purpose flour
- 1/2 cup granulated sugar
- 1 1/2 teaspoons baking powder
- 1/2 teaspoon baking soda
- 1/4 teaspoon salt
- 1 cup Greek yogurt
- 2 large eggs
- 1/4 cup unsalted butter, melted
- 1 teaspoon vanilla extract
- Zest of one mandarin orange fruit
- 1 cup canned mandarin oranges fruit, drained and roughly chopped (reserve a few segments for topping)
- 1/2 cup powdered sugar
- 1-2 tablespoons freshly squeezed mandarin orange juice
![]() Instruction For Mandarin Orange Muffins And Greek Yogurt Recipe:
Instruction For Mandarin Orange Muffins And Greek Yogurt Recipe:
- Preheat your oven to 350°F (175°C). Line a muffin tin with paper liners or grease it well with cooking spray.
- In a large mixing bowl, whisk together the all-purpose flour, granulated sugar, baking powder, baking soda, and salt.
- In another bowl, combine the Greek yogurt, eggs, melted butter, vanilla extract, and mandarin orange zest. Mix until well combined.
- Pour the wet ingredients into the dry ingredients and gently fold them together until just combined. Be careful not to overmix; a few lumps are okay.
- Gently fold in the chopped mandarin oranges fruit into the muffin batter.
- Spoon the muffin batter into the prepared muffin cups, filling each about 2/3 full.
- Place the muffin tin in the preheated oven and bake for approximately 18-20 minutes or until a toothpick inserted into the center of a muffin comes out clean.
- Allow the muffins to cool in the tin for a few minutes, then transfer them to a wire rack to cool completely.
- If desired, prepare the glaze by whisking together the powdered sugar and freshly squeezed mandarin orange juice. Drizzle the glaze over the cooled muffins and top each with a mandarin orange fruit segment for decoration.
- Enjoy your homemade mandarin orange muffins with Greek yogurt recipe! They are perfect for breakfast, brunch, or as a sweet snack.
Mango Fruit Recipe
28)![]() Ingredients For Mango Mousse Recipe:
Ingredients For Mango Mousse Recipe:
For the Mango Puree:
- 2 ripe mangoes fruit, peeled, pitted, and diced
- 2 tablespoons granulated sugar (adjust to taste)
- 1 tablespoon fresh lemon juice
- 1 1/2 cups heavy cream (chilled)
- 1/2 cup powdered sugar (adjust to taste)
- 1 teaspoon vanilla extract
- 1 envelope (about 2 1/4 teaspoons) unflavored gelatin
- 2 tablespoons cold water
- Mango fruit slices, mint leaves, or whipped cream for garnish (optional)
![]() Instruction For Mango Mousse Recipe:
Instruction For Mango Mousse Recipe:
- Place the diced mango fruit in a blender or food processor.
- Add the granulated sugar and fresh lemon juice.
- Blend until you have a smooth mango fruit puree. Taste and adjust the sugar if needed. Set aside.
- In a small bowl, sprinkle the gelatin over the cold water. Let it sit for about 5 minutes to bloom.
- After blooming, heat the gelatin mixture in the microwave for about 15 seconds or until it's fully dissolved. Alternatively, you can melt it on the stovetop over low heat. Make sure it's completely liquid and smooth.
- In a large mixing bowl, whip the chilled heavy cream until soft peaks form.
- Gradually add the powdered sugar and vanilla extract while continuing to whip the cream until it reaches stiff peaks. Be careful not to overwhip.
- Gently fold the mango fruit puree into the whipped cream until well combined.
- Then, fold in the dissolved gelatin mixture. Mix gently until everything is fully incorporated.
- Pour the mango mousse recipe mixture into serving glasses or dessert bowls.
- Refrigerate the mango mousse recipe for at least 2-3 hours, or until it sets and becomes firm.
- Before serving, you can garnish the mango mousse recipe with mango slices, a sprig of mint leaves, or a dollop of whipped cream if desired.
- Serve your homemade mango mousse recipe cold and savor the delicious, tropical mango flavor!
Mangosteen Fruit Recipe
29)![]() Ingredients For Mangosteen Pudding Recipe:
Ingredients For Mangosteen Pudding Recipe:
For The Mangosteen Puree:
- 1 cup of mangosteen fruit flesh (approximately 8-10 mangosteens)
- 2 tablespoons granulated sugar (adjust to taste)
- 1 tablespoon fresh lemon juice
- 2 cups whole milk
- 1/2 cup granulated sugar (adjust to taste)
- 1/4 cup cornstarch
- 1/4 cup cold water
- 1 teaspoon vanilla extract
- A pinch of salt
- Fresh mangosteen segments for garnish (optional)
![]() Instruction For Mangosteen Pudding Recipe:
Instruction For Mangosteen Pudding Recipe:
Prepare The Mangosteen Puree:
- Cut each mangosteen fruit in half and carefully remove the white flesh without breaking it. Discard the seeds and any tough parts.
- Place the mangosteen fruit flesh, granulated sugar, and fresh lemon juice in a blender or food processor.
- Blend until you have a smooth mangosteen fruit puree. Taste and adjust the sugar if needed. Set aside.
- In a small bowl, combine the cornstarch and cold water. Mix until the cornstarch is fully dissolved and you have a smooth paste. Set aside.
- In a saucepan, combine the whole milk, granulated sugar, vanilla extract, and a pinch of salt. Heat the mixture over medium heat until it starts to simmer, stirring occasionally.
- Once the milk mixture is simmering, gradually whisk in the cornstarch paste. Continue to cook and stir until the mixture thickens and comes to a gentle boil. This should take about 2-3 minutes.
- Remove the saucepan recipe from the heat and let it cool slightly for a few minutes.
- Gently fold the mangosteen fruit puree into the pudding mixture until well combined.
- Pour the mangosteen pudding recipe mixture into serving bowls or glasses.
- Allow the pudding to cool at room temperature for a bit, then cover each serving with plastic wrap or a lid.
- Refrigerate the mangosteen pudding recipe for at least 2 hours or until it has set and is cold.
- Before serving, you can garnish the mangosteen pudding with fresh mangosteen segments if desired.
- Enjoy your homemade mangosteen pudding recipe as a unique and delicious dessert!
Mulberry Fruit Recipe
30)![]() Ingredients For Mulberry Brownies Recipe:
Ingredients For Mulberry Brownies Recipe:
- 1/2 cup (1 stick) unsalted butter
- 1 cup granulated sugar
- 2 large eggs
- 1 teaspoon vanilla extract
- 1/3 cup unsweetened cocoa powder
- 1/2 cup all-purpose flour
- 1/4 teaspoon salt
- 1/4 teaspoon baking powder
- 1/2 cup fresh mulberries fruit, rinsed and stems removed (you can also use frozen mulberries, but thaw and drain them first)
- 1/2 cup chocolate chips or chunks (optional, for added richness)
![]() Instruction For Mulberry Brownies Recipe:
Instruction For Mulberry Brownies Recipe:
- Preheat your oven to 350°F (175°C). Grease and line an 8x8-inch (20x20 cm) square baking pan with parchment paper, leaving an overhang on two opposite sides for easy brownie removal.
- In a microwave-safe bowl or on the stovetop, melt the butter until it's completely liquid. Allow it to cool slightly.
- In a mixing bowl, whisk together the melted butter and granulated sugar until well combined.
- Add the eggs and vanilla extract to the butter-sugar mixture and whisk until smooth.
- In another bowl, sift the cocoa powder, all-purpose flour, salt, and baking powder together.
- Gradually add the dry ingredients to the wet ingredients and stir until just combined. Be careful not to overmix; you want a smooth batter.
- Gently fold in the fresh mulberries fruit and chocolate chips or chunks (if using). The mulberries may break slightly as you mix, but that's okay; it adds to the marbled effect.
- Pour the brownie batter into the prepared baking pan and spread it evenly.
- Bake in the preheated oven for approximately 25-30 minutes or until a toothpick inserted into the center comes out with a few moist crumbs clinging to it. The exact baking time may vary depending on your oven.
- Allow the mulberry brownies recipe to cool in the pan for about 10-15 minutes, then use the parchment paper overhang to lift them out of the pan. Place them on a wire rack to cool completely.
- Once the brownies are completely cool, cut them into squares or bars. Enjoy your homemade mulberry brownies recipe!
Muskmelon Fruit Recipe
31)![]() Ingredients For Muskmelon Kheer Recipe:
Ingredients For Muskmelon Kheer Recipe:
- 2 cups ripe muskmelon fruit (cantaloupe) pulp, seeds removed and chopped
- 1 liter whole milk
- 1/2 cup sugar (adjust to taste)
- 1/4 cup condensed milk
- 1/4 cup chopped nuts (almonds, cashews, and pistachios), toasted
- 1/2 teaspoon cardamom powder
- A pinch of saffron strands (optional)
- 1 tablespoon ghee (clarified butter)
- A few melon balls or slices for garnish (optional)
![]() Instruction For Muskmelon Kheer Recipe:
Instruction For Muskmelon Kheer Recipe:
- Peel the ripe muskmelon fruit, remove the seeds, and chop it into small pieces.
- Place the chopped muskmelon fruit in a blender or food processor and blend until you have a smooth pulp. Set it aside.
- If you're using saffron strands, soak them in 1 tablespoon of warm milk and set them aside. This will help infuse the saffron flavor and color.
- In a heavy-bottomed pan, heat the ghee over medium heat.
- Add the chopped nuts and sauté them until they turn golden brown. Remove them from the pan and set them aside for garnish.
- Reduce the heat to low and simmer, stirring frequently, until the milk reduces to about half its original volume. This process can take 45 minutes to 1 hour.
- Once the milk has reduced, add the muskmelon fruit pulp to the pan and mix well.
- Stir in the sugar and condensed milk. Continue to simmer on low heat for another 10-15 minutes, or until the kheer thickens and the muskmelon is well incorporated.
- Sprinkle the cardamom powder and the saffron milk (if using) into the kheer. Mix well.
- Remove the muskmelon kheer recipe from the heat. Garnish with the toasted nuts and melon balls or slices (if desired).
- Allow the kheer to cool to room temperature, and then refrigerate it for a few hours until it's nicely chilled.
- Serve the chilled muskmelon kheer recipe as a refreshing and sweet dessert.
Orange Fruit Recipe
32)![]() Ingredients For Orange Cream Tart Recipe:
Ingredients For Orange Cream Tart Recipe:
For The Tart Crust:
- 1 1/2 cups all-purpose flour
- 1/2 cup unsalted butter, cold and cubed
- 1/4 cup granulated sugar
- 1 egg yolk
- 2-3 tablespoons ice water
- 1 cup freshly squeezed orange fruit juice (from about 3-4 oranges)
- Zest of 2 oranges
- 3/4 cup granulated sugar
- 4 large egg yolks
- 3 tablespoons cornstarch
- 1/4 teaspoon salt
- 1/4 cup unsalted butter
- 1 cup heavy cream
- 1 teaspoon vanilla extract
![]() Instruction For Orange Cream Tart Recipe:
Instruction For Orange Cream Tart Recipe:
Prepare The Tart Crust:
- In a food processor, combine the flour, cold cubed butter, and granulated sugar. Pulse until the mixture resembles coarse crumbs.
- Add the egg yolk and 2 tablespoons of ice water. Pulse until the dough starts to come together. If it's too dry, add an additional tablespoon of ice water.
- Turn the dough out onto a floured surface and gently knead it a few times to bring it together into a ball. Flatten it into a disc, wrap it in plastic wrap, and refrigerate for at least 30 minutes.
- Preheat your oven to 375°F (190°C).
- Roll out the chilled dough on a floured surface into a circle that's large enough to fit your tart pan. Carefully transfer the dough to the tart pan, pressing it into the bottom and up the sides.
- Prick the bottom of the crust with a fork, and then line it with parchment paper and fill it with pie weights or dried beans.
- Bake the crust for about 15 minutes. Remove the parchment paper and weights, and continue baking for another 10-15 minutes or until the crust is golden brown. Allow it to cool completely.
- In a medium saucepan, combine the freshly squeezed orange fruit juice, orange zest, and half of the granulated sugar (6 tablespoons). Bring this mixture to a simmer over medium heat.
- In a separate bowl, whisk together the remaining granulated sugar, egg yolks, cornstarch, and salt until well combined.
- Gradually pour the hot orange fruit juice mixture into the egg yolk mixture, whisking constantly.
- Return the mixture to the saucepan and cook over medium heat, whisking continuously until it thickens and comes to a boil. This should take about 2-3 minutes.
- Remove the mixture from the heat and stir in the butter until it's fully melted and incorporated.
- Strain the orange cream through a fine-mesh sieve into a clean bowl to remove any zest or cooked bits.
- Place plastic wrap directly on the surface of the orange cream to prevent a skin from forming. Let it cool to room temperature, and then refrigerate it until completely chilled.
- Whip the heavy cream and vanilla extract until stiff peaks form.
- Gently fold half of the whipped cream into the chilled orange cream filling until well combined.
- Spoon the orange cream recipe filling into the cooled tart crust.
- Top the tart with the remaining whipped cream.
- Garnish with additional orange zest or slices, if desired.
- Chill the tart recipe in the refrigerator for at least 2 hours before serving.
Olive Fruit Recipe
33)![]() Ingredients For Baking Sheet Pizza With Olives And Sun-Dried Tomatoes Recipe:
Ingredients For Baking Sheet Pizza With Olives And Sun-Dried Tomatoes Recipe:
For The Pizza Dough:
- 1 pound (about 4 cups) pizza dough, store-bought or homemade
- All-purpose flour, for dusting
- 1/2 cup pizza sauce or marinara sauce
- 1 1/2 cups shredded mozzarella cheese (or more, to taste)
- 1/2 cup sliced black olives fruit
- 1/4 cup chopped sun-dried tomatoes (packed in oil and drained)
- 1/4 cup grated Parmesan cheese
- Red pepper flakes (optional, for added heat)
- Fresh basil leaves, for garnish (optional)
- Olive oil, for drizzling
![]() Instruction For Baking Sheet Pizza With Olives And Sun-Dried Tomatoes Recipe:
Instruction For Baking Sheet Pizza With Olives And Sun-Dried Tomatoes Recipe:
- Preheat your oven to 450°F (230°C). Place a baking sheet or a large oven-safe tray in the oven as it preheats.
- On a floured surface, roll out the pizza dough into a rectangular shape, roughly the size of your baking sheet. If it starts to spring back, let it rest for a few minutes, then continue rolling.
- Carefully remove the hot baking sheet from the oven (use oven mitts). Sprinkle it with a bit of cornmeal or flour to prevent sticking.
- Gently transfer the rolled-out pizza dough to the hot baking sheet. It should start to sizzle when it makes contact.
- Spread the pizza sauce recipe evenly over the dough, leaving a small border for the crust.
- Sprinkle the shredded mozzarella cheese evenly over the sauce.
- Distribute the sliced black olives fruit and chopped sun-dried tomatoes across the pizza.
- Place the baking sheet with the pizza recipe in the preheated oven and bake for about 12-15 minutes or until the crust is golden brown, and the cheese is bubbling and slightly browned.
- Remove the baking sheet from the oven and let the pizza cool for a minute or two.
- Sprinkle the grated Parmesan cheese over the hot pizza.
- If desired, add a pinch of red pepper flakes for a bit of heat.
- Garnish with fresh basil leaves, if available, and drizzle with a little olive fruit oil.
- Use a pizza cutter or a sharp knife to slice the pizza into squares or rectangles.
- Serve immediately while it's hot and enjoy your delicious homemade baking sheet pizza with olives and sun-dried tomatoes recipe!
Papaya Fruit Recipe
34)![]() Ingredients For Papaya Cake With Crumb Topping Recipe:
Ingredients For Papaya Cake With Crumb Topping Recipe:
For The Cake:
- 1 1/2 cups all-purpose flour
- 1 teaspoon baking powder
- 1/2 teaspoon baking soda
- 1/2 teaspoon salt
- 1/2 teaspoon ground cinnamon
- 1/4 teaspoon ground nutmeg
- 1/2 cup unsalted butter, softened
- 1 cup granulated sugar
- 2 large eggs
- 1 teaspoon vanilla extract
- 1 1/2 cups ripe papaya fruit, mashed
- 1/2 cup chopped walnuts or pecans (optional)
- 1/2 cup all-purpose flour
- 1/4 cup granulated sugar
- 1/4 cup brown sugar
- 1/2 teaspoon ground cinnamon
- 1/4 cup unsalted butter, melted
![]() Instruction For Papaya Cake With Crumb Topping Recipe:
Instruction For Papaya Cake With Crumb Topping Recipe:
Prepare The Crumb Topping:
- In a small mixing bowl, combine the all-purpose flour, granulated sugar, brown sugar, and ground cinnamon for the crumb topping.
- Pour the melted butter over the dry ingredients and stir until the mixture forms coarse crumbs recipe. Set aside.
- Preheat your oven to 350°F (175°C). Grease and flour a 9x9-inch (23x23 cm) square baking pan or a similar-sized baking dish.
- In a medium-sized mixing bowl, whisk together the all-purpose flour, baking powder, baking soda, salt, ground cinnamon, and ground nutmeg. Set aside.
- In a large mixing bowl, cream together the softened butter and granulated sugar until light and fluffy.
- Add the eggs one at a time, beating well after each addition. Stir in the vanilla extract.
- Gradually add the dry ingredients to the wet ingredients and mix until just combined.
- Gently fold in the mashed ripe papaya fruit and chopped nuts (if using).
- Pour the papaya cake recipe batter into the prepared baking pan, spreading it evenly.
- Sprinkle the crumb topping evenly over the cake batter.
- Place the baking pan in the preheated oven and bake for 30-35 minutes, or until a toothpick inserted into the center of the cake comes out clean and the top is golden brown.
- Remove the cake from the oven and let it cool in the pan for about 10-15 minutes.
- After it has cooled slightly, cut the papaya cake recipe into squares or rectangles and serve.
PassionFruit Fruit Recipe
35)![]() Ingredients For Passionfruit And White Chocolate Muffins Recipe:
Ingredients For Passionfruit And White Chocolate Muffins Recipe:
- 2 cups all-purpose flour
- 2/3 cup granulated sugar
- 2 teaspoons baking powder
- 1/2 teaspoon baking soda
- 1/4 teaspoon salt
- 1/2 cup unsalted butter, melted and cooled
- 2 large eggs
- 1/2 cup plain yogurt
- 1/2 cup passionfruit fruit pulp (from about 4-5 passionfruits)
- 1 teaspoon vanilla extract
- 1/2 cup white chocolate chips or chunks
![]() Instruction For Passionfruit And White Chocolate Muffins Recipe:
Instruction For Passionfruit And White Chocolate Muffins Recipe:
- Preheat your oven to 350°F (175°C). Line a muffin tin with paper liners or grease it well with cooking spray.
- In a large mixing bowl, whisk together the all-purpose flour, granulated sugar, baking powder, baking soda, and salt.
- In another bowl, whisk together the melted butter, eggs, plain yogurt, passionfruit fruit pulp, and vanilla extract until well combined.
- Pour the wet ingredients into the bowl with the dry ingredients. Gently fold them together until just combined. Be careful not to overmix; a few lumps are okay.
- Fold in the white chocolate chips recipe or chunks into the muffin batter.
- Spoon the muffin batter into the prepared muffin cups, filling each about 2/3 full.
- Place the muffin tin in the preheated oven and bake for approximately 18-20 minutes or until a toothpick inserted into the center of a muffin comes out clean or with a few moist crumbs.
- Allow the muffins to cool in the tin for a few minutes, then transfer them to a wire rack to cool completely.
- Once the muffins are completely cool, serve and enjoy your homemade passionfruit and white chocolate muffins recipe!
Peach Fruit Recipe
36)![]() Ingredients For Bourbon Peach Pie Recipe:
Ingredients For Bourbon Peach Pie Recipe:
For The Pie Crust:
- 2 1/2 cups all-purpose flour
- 1 teaspoon salt
- 1 cup (2 sticks) unsalted butter, cold and cubed
- 6-8 tablespoons ice water
- 6-7 cups fresh, ripe peaches fruit (about 6-7 peaches), peeled, pitted, and sliced
- 1/2 cup granulated sugar (adjust to taste, depending on the sweetness of your peaches)
- 1/4 cup brown sugar, packed
- 1/4 cup all-purpose flour
- 1/4 teaspoon ground cinnamon
- 1/4 teaspoon ground nutmeg
- 1/4 cup bourbon
- 1 teaspoon vanilla extract
- 2 tablespoons unsalted butter, cut into small pieces
- 1 egg
- 1 tablespoon water
![]() Instruction For Bourbon Peach Pie Recipe:
Instruction For Bourbon Peach Pie Recipe:
Prepare The Pie Crust:
- In a large mixing bowl, combine the all-purpose flour and salt.
- Add the cold, cubed butter to the flour mixture. Use a pastry cutter or your fingers to work the butter into the flour until it resembles coarse crumbs.
- Gradually add ice water, one tablespoon at a time, and mix until the dough comes together. Be careful not to overmix.
- Divide the dough into two equal portions, shape them into disks, wrap in plastic wrap, and refrigerate for at least 1 hour (or overnight).
- In a large mixing bowl, combine the sliced peaches fruit, granulated sugar, brown sugar, flour, ground cinnamon, and ground nutmeg. Toss to coat the peaches fruit evenly.
- In a small bowl, mix the bourbon and vanilla extract. Pour this mixture over the peaches fruit and stir to combine. Let the filling sit for about 15-20 minutes to allow the flavors to meld.
- Preheat your oven to 425°F (220°C).
- Roll out one of the chilled pie crust disks on a floured surface to fit a 9-inch pie dish. Place it in the pie dish and trim any excess dough from the edges.
- Pour the bourbon-infused peach filling into the pie crust, spreading it evenly.
- Dot the filling with small pieces of butter.
- Roll out the second chilled pie crust recipe disk and place it over the filling. Trim and crimp the edges to seal the pie.
- In a small bowl, beat the egg with water to create an egg wash. Brush the top crust with the egg wash.
- Cut a few slits in the top crust to allow steam to escape.
- Place the pie on a baking sheet (to catch any drips) and bake in the preheated oven for 45-50 minutes, or until the crust is golden brown and the filling is bubbling.
- If the edges of the crust start to brown too quickly, you can cover them with aluminum foil.
- Allow the bourbon peach pie to cool to room temperature before serving. This allows the filling to set.
- Slice and serve your delicious bourbon peach pie recipe, optionally with a scoop of vanilla ice cream.
Pear Fruit Recipe
37)![]() Ingredients For Baked Pear Pie Recipe:
Ingredients For Baked Pear Pie Recipe:
For The Pie Crust:
- 2 1/2 cups all-purpose flour
- 1 teaspoon salt
- 1 cup (2 sticks) unsalted butter, cold and cubed
- 6-8 tablespoons ice water
- 5-6 ripe pears fruit, peeled, cored, and sliced
- 1/2 cup granulated sugar
- 1/4 cup brown sugar, packed
- 2 tablespoons all-purpose flour
- 1/2 teaspoon ground cinnamon
- 1/4 teaspoon ground nutmeg
- 1/4 teaspoon salt
- 1 tablespoon lemon juice
- 1 teaspoon vanilla extract
- 1/2 cup all-purpose flour
- 1/2 cup granulated sugar
- 1/4 cup unsalted butter, softened
![]() Instruction For Baked Pear Pie Recipe:
Instruction For Baked Pear Pie Recipe:
Prepare The Pie Crust:
- In a large mixing bowl, combine the all-purpose flour and salt.
- Add the cold, cubed butter to the flour mixture. Use a pastry cutter or your fingers to work the butter into the flour until it resembles coarse crumbs.
- Gradually add ice water, one tablespoon at a time, and mix until the dough comes together. Be careful not to overmix.
- Divide the dough into two equal portions, shape them into disks, wrap in plastic wrap, and refrigerate for at least 1 hour (or overnight).
- In a large mixing bowl, combine the sliced pears fruit, granulated sugar, brown sugar, all-purpose flour, ground cinnamon, ground nutmeg, salt, lemon juice, and vanilla extract. Toss to coat the pears fruit evenly.
- Preheat your oven to 425°F (220°C).
- Roll out one of the chilled pie crust recipe disks on a floured surface to fit a 9-inch pie dish. Place it in the pie dish and trim any excess dough from the edges.
- Pour the prepared pear filling into the pie crust, spreading it evenly.
- Roll out the second chilled pie crust recipe disk and place it over the filling. Trim and crimp the edges to seal the pie.
- In a small bowl, combine the all-purpose flour, granulated sugar, and softened butter. Mix until you have a crumbly texture.
- If using the topping, sprinkle it evenly over the top crust.
- Cut a few slits in the top crust to allow steam to escape.
- Place the pie on a baking sheet (to catch any drips) and bake in the preheated oven for 45-50 minutes, or until the crust is golden brown and the filling is bubbling.
- If the edges of the crust start to brown too quickly, you can cover them with aluminum foil.
- Allow the baked pear pie recipe to cool to room temperature before serving. This allows the filling to set.
- Slice and serve your delicious baked pear pie recipe, optionally with a scoop of vanilla ice cream or a dollop of whipped cream.
Persimmon Fruit Recipe
38)![]() Ingredients For Persimmon Crumble Pie Recipe:
Ingredients For Persimmon Crumble Pie Recipe:
For The Pie Crust:
- 1 1/4 cups all-purpose flour
- 1/2 teaspoon salt
- 1/2 cup (1 stick) unsalted butter, cold and cubed
- 3-4 tablespoons ice water
- 4-5 ripe persimmons fruit (about 2 cups of puree), peeled and mashed
- 1/2 cup granulated sugar (adjust to taste, depending on the sweetness of your persimmons)
- 2 tablespoons lemon juice
- 1 teaspoon vanilla extract
- 1/2 teaspoon ground cinnamon
- 1/4 teaspoon ground nutmeg
- 2 tablespoons cornstarch
- 1/2 cup all-purpose flour
- 1/4 cup granulated sugar
- 1/4 cup brown sugar, packed
- 1/2 teaspoon ground cinnamon
- 1/4 teaspoon salt
- 1/4 cup unsalted butter, softened
- 1/2 cup rolled oats (optional, for added texture)
![]() Instruction For Persimmon Crumble Pie Recipe:
Instruction For Persimmon Crumble Pie Recipe:
Prepare The Pie Crust:
- In a large mixing bowl, combine the all-purpose flour and salt.
- Add the cold, cubed butter to the flour mixture. Use a pastry cutter or your fingers to work the butter into the flour until it resembles coarse crumbs.
- Gradually add ice water, one tablespoon at a time, and mix until the dough comes together. Be careful not to overmix.
- Form the dough into a ball, flatten it into a disk, wrap it in plastic wrap, and refrigerate for at least 30 minutes.
- Peel and mash the ripe persimmons fruit until you have about 2 cups of puree.
- In a medium-sized mixing bowl, combine the persimmon fruit puree, granulated sugar, lemon juice, vanilla extract, ground cinnamon, ground nutmeg, and cornstarch. Mix until well combined. Taste and adjust the sugar if needed.
- In a separate mixing bowl, combine the all-purpose flour, granulated sugar, brown sugar, ground cinnamon, and salt.
- Add the softened butter to the dry ingredients and use a fork or your fingers to mix until you have a crumbly texture. If using rolled oats, add them to the crumble recipe mixture and mix to combine.
- Preheat your oven to 375°F (190°C).
- Roll out the chilled pie crust on a floured surface to fit a 9-inch pie dish. Place it in the pie dish and trim any excess dough from the edges.
- Pour the prepared persimmon fruit filling into the pie crust, spreading it evenly.
- Sprinkle the crumble topping evenly over the persimmon filling.
- Place the pie in the preheated oven and bake for 45-50 minutes, or until the crust is golden brown and the filling is bubbling.
- If the edges of the crust start to brown too quickly, you can cover them with aluminum foil.
- Allow the persimmon crumble pie recipe to cool to room temperature before serving.
- Slice and serve your delicious persimmon crumble pie recipe, optionally with a scoop of vanilla ice cream or a dollop of whipped cream.
Pineapple Fruit Recipe
39)![]() Ingredients For Pineapple Upside-Down Cake Recipe:
Ingredients For Pineapple Upside-Down Cake Recipe:
For The Topping:
- 1/4 cup (4 tablespoons) unsalted butter
- 3/4 cup packed brown sugar
- 1 can (20 ounces) pineapple fruit slices (you can also use fresh pineapple)
- Maraschino cherries (as many as you like)
- 1 1/2 cups all-purpose flour
- 1 1/2 teaspoons baking powder
- 1/4 teaspoon salt
- 1/2 cup (1 stick) unsalted butter, softened
- 1 cup granulated sugar
- 2 large eggs
- 1 teaspoon pure vanilla extract
- 1/2 cup pineapple fruit juice (from the canned pineapple)
![]() Instruction For Pineapple Upside-Down Cake Recipe:
Instruction For Pineapple Upside-Down Cake Recipe:
- Preheat your oven to 350°F (175°C).
- In a 9-inch round cake pan, melt 1/4 cup of butter over low heat. Make sure to coat the bottom and sides evenly. Remove from heat.
- Sprinkle the brown sugar evenly over the melted butter in the cake pan.
- Arrange the pineapple fruit slices on top of the brown sugar in a decorative pattern. Place maraschino cherries in the center of each pineapple fruit slice and in any other gaps.
- In a medium mixing bowl, whisk together the flour, baking powder, and salt. Set this dry mixture aside.
- In another mixing bowl, using an electric mixer, cream together the softened butter and granulated sugar until light and fluffy.
- Add the eggs one at a time, beating well after each addition. Stir in the vanilla extract.
- Gradually add the dry mixture to the wet mixture, alternating with the pineapple fruit juice. Start and end with the dry mixture, mixing until just combined. Do not overmix.
- Carefully spread the cake batter over the arranged pineapple fruit slices and cherries fruit in the cake pan. Smooth the top evenly.
- Bake in the preheated oven for 45-50 minutes or until a toothpick inserted into the center of the cake comes out clean.
- Once the cake is done, remove it from the oven and let it cool in the pan for about 10 minutes.
- Place a serving plate or platter over the top of the cake pan. Carefully invert the cake onto the plate, allowing the pineapple fruit slices and cherries to become the topping.
- Serve the Pineapple Upside-Down Cake recipe warm or at room temperature. You can enjoy it plain or with a dollop of whipped cream or a scoop of vanilla ice cream.
Plum Fruit Recipe
40)![]() Ingredients For Plum Crumble Cake Slices Recipe:
Ingredients For Plum Crumble Cake Slices Recipe:
For The Cake:
- 1 1/2 cups all-purpose flour
- 1 1/2 teaspoons baking powder
- 1/2 teaspoon salt
- 1/2 cup unsalted butter, softened
- 1 cup granulated sugar
- 2 large eggs
- 1 teaspoon vanilla extract
- 1/2 cup sour cream
- 4-5 ripe plums fruit, pitted and sliced
- 1/2 cup all-purpose flour
- 1/4 cup granulated sugar
- 1/4 cup brown sugar
- 1/2 teaspoon ground cinnamon
- 1/4 cup unsalted butter, cold and diced
![]() Instruction For Plum Crumble Cake Slices Recipe:
Instruction For Plum Crumble Cake Slices Recipe:
- Preheat your oven to 350°F (175°C). Grease and flour a 9x9-inch (23x23 cm) square baking pan or a similar-sized baking dish.
- In a medium mixing bowl, whisk together the flour, baking powder, and salt. Set aside.
- In a separate large mixing bowl, cream together the softened butter and granulated sugar until light and fluffy, which takes about 2-3 minutes.
- Add the eggs one at a time, mixing well after each addition. Stir in the vanilla extract.
- Gradually add the dry flour mixture to the wet mixture, alternating with the sour cream. Begin and end with the dry mixture, mixing until just combined.
- Spread the cake batter evenly into the prepared baking pan.
- Arrange the plum fruit slices on top of the cake batter, slightly pressing them in.
- In a separate bowl, combine the flour, granulated sugar, brown sugar, and ground cinnamon for the crumble topping. Mix well.
- Add the cold, diced butter to the crumble mixture and use a pastry cutter or your fingers to blend it until the mixture resembles coarse crumbs.
- Sprinkle the crumble topping evenly over the plum fruit slices.
- Bake in the preheated oven for 40-45 minutes or until the top is golden brown, and a toothpick inserted into the center of the cake comes out clean.
- Allow the Plum Crumble Cake recipe to cool in the pan for about 15-20 minutes before slicing.
- Once recipe cooled slightly, cut into squares or slices and serve. You can serve it warm or at room temperature.
Pomegranate Fruit Recipe
41)![]() Ingredients For Pomegranate Cheeseball Recipe:
Ingredients For Pomegranate Cheeseball Recipe:
- 8 ounces cream cheese, softened
- 1 cup shredded sharp cheddar cheese
- 1/4 cup finely chopped green onions (green parts)
- 1/4 cup chopped fresh parsley
- 1/4 cup chopped fresh cilantro (optional)
- 1/4 cup pomegranate fruit seeds (plus extra for coating)
- 1/4 teaspoon salt
- 1/4 teaspoon black pepper
- 1/2 cup chopped pecans or walnuts (optional, for coating)
- Crackers, bread, or vegetable sticks for serving
![]() Instruction For Pomegranate Cheeseball Recipe:
Instruction For Pomegranate Cheeseball Recipe:
- In a mixing bowl, combine the softened cream cheese, shredded cheddar cheese, chopped green onions, fresh parsley, and optional cilantro. Use a spatula or hand mixer to blend everything together until it's well combined.
- Add the pomegranate seeds, salt, and black pepper to the cheese mixture. Gently fold them in until evenly distributed. Be careful not to crush the pomegranate fruit seeds.
- Lay out a sheet of plastic wrap on your countertop. Spoon the cheese mixture onto the plastic wrap and shape it into a ball.
- Wrap the cheeseball tightly in the plastic wrap and refrigerate for at least 1-2 hours, or until it's firm. You can also leave it in the fridge overnight if you're preparing it in advance.
- Before serving, prepare the coating for the cheeseball. You can use chopped pecans or walnuts for a nutty coating or additional pomegranate fruit seeds for a colorful and crunchy option.
- Unwrap the chilled cheeseball recipe and roll it in your chosen coating until it's evenly covered. If using pomegranate seeds, gently press them onto the surface to make sure they adhere.
- Place the coated cheeseball recipe on a serving platter and surround it with crackers, slices of bread, or vegetable sticks.
- Serve your Pomegranate Cheeseball recipe as an appetizer at your next gathering. Guests can use the crackers or other dippers to scoop up the creamy and flavorful cheese mixture.
Pomelo Fruit Recipe
42)![]() Ingredients For Coconut And Pomelo Mochi Pudding Recipe:
Ingredients For Coconut And Pomelo Mochi Pudding Recipe:
For The Mochi Layer:
- 1 cup glutinous rice flour
- 1/2 cup granulated sugar
- 1 cup coconut milk
- 1/2 cup water
- 1/4 teaspoon vanilla extract
- 1 large pomelo fruit
- 1/2 cup pomelo fruit juice (from the pomelo)
- 1/4 cup granulated sugar
- 1/4 cup water
- 2 tablespoons agar-agar powder (or gelatin if preferred)
![]() Instruction For Coconut And Pomelo Mochi Pudding Recipe:
Instruction For Coconut And Pomelo Mochi Pudding Recipe:
For The Mochi Layer:
- In a mixing bowl, whisk together the glutinous rice flour and sugar.
- In a separate microwave-safe bowl, combine the coconut milk, water, and vanilla extract.
- Slowly add the liquid mixture to the dry ingredients, whisking continuously to avoid lumps.
- Once the mixture is smooth, microwave it on high for 2-3 minutes, stopping to stir every 30 seconds. The mixture will thicken and become sticky.
- Remove the mochi recipe from the microwave and let it cool slightly.
- Lightly grease an 8x8-inch (20x20 cm) square dish or a similar-sized container.
- Transfer the mochi recipe mixture into the greased dish, spreading it out evenly. Allow it to cool completely and set at room temperature.
- Peel and separate the pomelo fruit segments, removing any seeds and membranes. Set aside.
- In a small saucepan, combine the pomelo fruit juice, sugar, and water. Heat the mixture over low heat, stirring until the sugar is fully dissolved.
- Sprinkle the agar-agar powder into the pomelo fruit mixture while stirring continuously. Keep heating and stirring until the agar-agar is fully dissolved and the mixture starts to simmer. This should take about 5-7 minutes.
- Remove the pomelo fruit mixture from heat and let it cool slightly.
- Once both the mochi and pomelo fruit recipe mixtures have cooled but are still slightly warm, gently place the pomelo segments on top of the mochi layer in the dish.
- Carefully pour the pomelo fruit mixture over the pomelo segments, covering them completely.
- Allow the pudding to cool to room temperature, and then refrigerate it for a few hours, or until it's fully set and chilled.
- Once the pudding has set, cut it into squares or desired shapes.
- Serve the coconut and pomelo mochi pudding recipe chilled. Enjoy the delightful combination of coconut fruit, pomelo fruit, and mochi textures and flavors!
Quince Fruit Recipe
43)![]() Ingredients For Quince Crumble Cake And Tawny Port Recipe:
Ingredients For Quince Crumble Cake And Tawny Port Recipe:
For The Quince Filling:
- 2 large quinces fruit, peeled, cored, and chopped into small pieces
- 1/2 cup granulated sugar
- 1/4 cup water
- 1 cinnamon stick (optional)
- 1/2 teaspoon vanilla extract (optional)
- 1 1/2 cups all-purpose flour
- 1 1/2 teaspoons baking powder
- 1/2 teaspoon salt
- 1/2 cup unsalted butter, softened
- 1 cup granulated sugar
- 2 large eggs
- 1 teaspoon vanilla extract
- 1/2 cup milk
- 1/2 cup all-purpose flour
- 1/2 cup granulated sugar
- 1/4 cup unsalted butter, cold and diced
![]() Instruction For Quince Crumble Cake And Tawny Port Recipe:
Instruction For Quince Crumble Cake And Tawny Port Recipe:
For The Quince Filling:
- In a saucepan, combine the chopped quinces fruit, sugar, water, and optional cinnamon stick (if using). Simmer over medium heat, stirring occasionally, until the quinces fruit are soft and the mixture thickens (about 20-25 minutes).
- Remove from heat, discard the cinnamon stick, and stir in the vanilla extract if desired. Allow it to cool.
- Preheat your oven to 350°F (175°C). Grease and flour a 9x9-inch (23x23 cm) square baking pan or a similar-sized dish.
- In a medium bowl, whisk together the flour, baking powder, and salt. Set aside.
- In a separate large bowl, cream together the softened butter and sugar until light and fluffy.
- Add the eggs one at a time, beating well after each addition. Stir in the vanilla extract.
- Gradually add the dry flour mixture to the wet mixture, alternating with the milk. Begin and end with the dry mixture, mixing until just combined.
- In a small bowl, combine the flour and sugar for the crumble topping recipe.
- Add the cold, diced butter and use a pastry cutter or your fingers to blend it until the mixture resembles coarse crumbs.
- Spread the cake batter evenly into the prepared baking pan.
- Spoon the cooled quince fruit filling over the cake butter.
- Sprinkle the crumble topping evenly over the quince fruit filling.
- Bake in the preheated oven for 40-45 minutes or until the top is golden brown, and a toothpick inserted into the cake comes out clean.
- Once the quince crumble cake recipe has cooled slightly, cut it into squares or slices.
- Serve a slice of quince crumble cake recipe on a dessert plate alongside a glass of tawny port.
- Sip the tawny port recipe while enjoying the delicious combination of flavors from the cake and the wine.
Rambutan Fruit Recipe
44)![]() Ingredients For Rambutan Marshmallow Sugar Cookies Recipe:
Ingredients For Rambutan Marshmallow Sugar Cookies Recipe:
For The Sugar Cookies:
- 2 3/4 cups all-purpose flour
- 1 teaspoon baking soda
- 1/2 teaspoon baking powder
- 1 cup unsalted butter, softened
- 1 1/2 cups granulated sugar
- 1 egg
- 1 teaspoon vanilla extract
- 1/2 teaspoon almond extract (optional)
- 15-20 rambutans fruit, peeled, deseeded, and finely chopped (reserve a few for garnish)
- 1 cup marshmallow fluff or marshmallow creme
![]() Instruction For Rambutan Marshmallow Sugar Cookies Recipe:
Instruction For Rambutan Marshmallow Sugar Cookies Recipe:
For The Sugar Cookies:
- In a medium-sized mixing bowl, whisk together the flour, baking soda, and baking powder. Set aside.
- In a large mixing bowl, cream together the softened butter and granulated sugar until light and fluffy.
- Add the egg, vanilla extract, and optional almond extract to the butter mixture. Mix until well combined.
- Gradually add the dry flour mixture to the wet mixture, mixing until a soft dough forms.
- Gently fold in the finely chopped rambutans. Make sure they are evenly distributed throughout the dough.
- Divide the dough in half and shape each half into a log. Wrap them in plastic wrap and refrigerate for at least 1 hour or until firm.
- Preheat your oven to 350°F (175°C) and line baking sheets with parchment paper.
- Take one of the chilled dough logs and slice it into thin rounds, about 1/4 inch (0.6 cm) thick.
- Place half of the cookie rounds on the prepared baking sheets, leaving some space between each.
- Place a small dollop of marshmallow fluff (about 1/2 to 1 teaspoon) in the center of each cookie round.
- Top each marshmallow-covered cookie with another cookie round, pressing gently to create a sandwich.
- Use the back of a fork to gently press the edges of each cookie to seal them together, creating a crisscross pattern on top.
- Repeat this process with the remaining dough and marshmallow fluff recipe.
- Garnish each cookie with a small piece of rambutan fruit on top.
- Bake in the preheated oven for 10-12 minutes or until the edges are lightly golden. The marshmallow filling will puff up during baking recipe.
- Remove the cookies from the oven and allow them to cool on the baking sheets for a few minutes before transferring them to a wire rack to cool completely.
Raspberry Fruit Recipe
45)![]() Ingredients For Raspberry Cheesecake Brownies Recipe:
Ingredients For Raspberry Cheesecake Brownies Recipe:
For The Brownie Layer:
- 1/2 cup (1 stick) unsalted butter
- 1 cup granulated sugar
- 2 large eggs
- 1 teaspoon vanilla extract
- 1/3 cup unsweetened cocoa powder
- 1/2 cup all-purpose flour
- 1/4 teaspoon salt
- 8 ounces (1 package) cream cheese, softened
- 1/4 cup granulated sugar
- 1 large egg
- 1/2 teaspoon vanilla extract
- 1/2 cup fresh raspberries fruit
- 2 tablespoons granulated sugar
![]() Instruction For Raspberry Cheesecake Brownies Recipe:
Instruction For Raspberry Cheesecake Brownies Recipe:
For The Brownie Layer:
- Preheat your oven to 350°F (175°C). Grease and line an 8x8-inch (20x20 cm) square baking pan with parchment paper, leaving an overhang on two sides for easy removal.
- In a medium-sized microwave-safe bowl, melt the butter in the microwave. Let it cool slightly.
- Stir in the granulated sugar, eggs, and vanilla extract into the melted butter until well combined.
- In another bowl, sift together the cocoa powder, all-purpose flour, and salt.
- Gradually add the dry ingredients to the wet mixture, mixing until just combined. Do not overmix.
- In a separate bowl, beat the softened cream cheese recipe until smooth and creamy.
- Add the granulated sugar, egg, and vanilla extract to the cream cheese. Beat until well combined.
- In a small bowl, mash the fresh raspberries fruit with a fork and stir in the granulated sugar.
- Pour the brownie batter into the prepared baking pan, spreading it out evenly.
- Drop spoonful of the cheesecake mixture onto the brownie butter.
- Drop spoonfuls of the raspberry mixture onto the brownie and cheesecake layers.
- Use a knife or a skewer to create swirls by gently dragging it through the layers to create a marbled effect.
- Bake in the preheated oven for 30-35 minutes or until a toothpick inserted into the center comes out with a few moist crumbs.
- Allow the Raspberry Cheesecake Brownies recipe to cool completely in the pan on a wire rack.
- Once cooled, lift the brownies out of the pan using the parchment paper overhang. Place them on a cutting board and cut into squares.
- Serve and enjoy these delicious and decadent Raspberry Cheesecake Brownies recipe!
Rose Apple Fruit Recipe
46)![]() Ingredients For Rose Apple Halwa Recipe:
Ingredients For Rose Apple Halwa Recipe:
- 2 cups of ripe rose apples fruit(jamun), washed, deseeded, and finely chopped
- 1 cup sugar
- 1/2 cup ghee (clarified butter)
- 1/2 cup milk
- 1/4 cup chopped nuts (almonds, cashews, pistachios)
- 1/4 teaspoon cardamom powder
- A pinch of saffron strands (optional)
- A few drops of rose water (optional, for added flavor)
- Ghee for greasing the pan
![]() Instruction For Rose Apple Halwa Recipe:
Instruction For Rose Apple Halwa Recipe:
- Start by washing the rose apples fruit (jamun) thoroughly. Cut them in half, remove the seeds, and finely chop them. You should have around 2 cups of chopped rose apples fruit.
- In a heavy-bottomed pan or kadai, heat ghee over medium-low heat.
- Add the chopped rose apples fruit to the pan and saute them in ghee for about 5-7 minutes until they become soft and slightly caramelized. Stir occasionally to prevent sticking to the pan.
- In the meantime, heat the milk in a separate small pan. You can add a pinch of saffron strands to the milk to infuse flavor and color (optional).
- Once the rose apples are soft and have released their juices, add sugar to the pan. Stir well.
- Continue cooking over medium heat while stirring frequently. The mixture will become thick and jam-like as the sugar melts.
- Add the warm milk to the pan. This will help soften the halwa and give it a creamy texture.
- Keep stirring continuously to avoid lumps and ensure that the halwa cooks evenly.
- As the halwa thickens, add chopped nuts and cardamom powder. Continue to cook and stir until the halwa reaches a thick, glossy consistency, and it starts leaving the sides of the pan. This can take around 20-25 minutes.
- If you're using rose water for added flavor, you can add a few drops at this stage.
- Once the rose apple halwa reaches the desired consistency, remove it from heat.
- Grease a plate or tray with ghee and transfer the hot halwa onto it. Use a spatula or the back of a spoon to flatten and smoothen the surface.
- Allow the halwa recipe to cool for a while. Once it's warm but still pliable, cut it into squares or diamonds.
- Let the rose apple halwa recipe cool completely before serving. It can be enjoyed at room temperature or chilled.
- Garnish with additional chopped nuts or edible rose petals if desired before serving.
Sapota Fruit Recipe
47)![]() Ingredients For Sapota Pudding Recipe:
Ingredients For Sapota Pudding Recipe:
- 4 ripe sapotas fruit (chikoos), peeled and seeds removed
- 1/2 cup milk
- 1/2 cup condensed milk (adjust to taste)
- 1/4 cup fresh cream
- 1/4 teaspoon cardamom powder
- A pinch of saffron strands (optional)
- Chopped nuts (such as almonds, cashews, or pistachios) for garnish
![]() Instruction For Sapota Pudding Recipe:
Instruction For Sapota Pudding Recipe:
- Begin by preparing the sapotas fruit. Peel them and remove any seeds. You should have about 2 cups of peeled sapota flesh.
- In a blender or food processor, add the sapota fruit flesh, milk, condensed milk, fresh cream, and cardamom powder. You can also add a pinch of saffron strands for extra flavor and color, but this is optional.
- Blend everything together until you have a smooth and creamy mixture. Taste the mixture and adjust the sweetness by adding more condensed milk if needed.
- Once the mixture is well blended and sweetened to your liking, transfer it to a saucepan.
- Cook the mixture over low heat, stirring constantly to prevent it from sticking to the bottom of the pan. Continue cooking for about 5-7 minutes until it thickens slightly. Be careful not to overcook; you want a creamy consistency.
- Remove the saucepan from heat and let the sapota pudding recipe cool to room temperature.
- Once cooled, transfer the pudding recipe into serving bowls or glasses.
- Refrigerate the sapota pudding recipe for at least 2 hours to chill and set.
- Before serving, garnish the pudding with chopped nuts of your choice, such as almonds, cashews, or pistachios.
- Serve the chilled sapota pudding recipe as a delightful and creamy dessert.
StarFruit Fruit Recipe
48)![]() Ingredients For Starfruit Upside-Down Cake Recipe:
Ingredients For Starfruit Upside-Down Cake Recipe:
For The Caramel Topping:
- 1/4 cup unsalted butter
- 1/2 cup brown sugar
- 2-3 ripe starfruits fruit, sliced into star-shaped slices (about 1/4-inch thick)
- 1 1/2 cups all-purpose flour
- 1 1/2 teaspoons baking powder
- 1/2 teaspoon baking soda
- 1/4 teaspoon salt
- 1/2 cup unsalted butter, softened
- 1 cup granulated sugar
- 2 large eggs
- 1 teaspoon vanilla extract
- 1/2 cup plain yogurt
- 1/4 cup milk
![]() Instruction For Starfruit Upside-Down Cake Recipe:
Instruction For Starfruit Upside-Down Cake Recipe:
For The Caramel Topping:
- In a saucepan, melt the 1/4 cup of butter over medium heat.
- Add the brown sugar to the melted butter and stir until it dissolves and turns into a caramel-like sauce.
- Pour the caramel recipe sauce into the bottom of a greased 9-inch (23 cm) round cake pan, spreading it out evenly.
- Arrange the star fruit slices in a decorative pattern on top of the caramel recipe.
- In a mixing bowl, whisk together the flour, baking powder, baking soda, and salt. Set aside.
- In another bowl, cream together the softened butter and granulated sugar until light and fluffy.
- Add the eggs one at a time, beating well after each addition. Stir in the vanilla extract.
- Alternately add the dry flour mixture and the wet ingredients (yogurt and milk) to the butter and sugar mixture, beginning and ending with the dry ingredients. Mix until just combined.
- Carefully pour the cake batter over the starfruit fruit slices and caramel in the cake pan. Spread it out evenly.
- Preheat your oven to 350°F (175°C).
- Place the cake pan in the preheated oven and bake for 30-35 minutes, or until a toothpick inserted into the center of the cake comes out clean.
- Remove the cake from the oven and let it cool in the pan for about 10 minutes.
- Run a knife around the edge of the cake to loosen it from the sides of the pan.
- Place a serving plate upside down on top of the cake pan. Carefully invert the cake onto the serving plate, allowing the starfruit fruit and caramel to become the top of the cake.
- Let the starfruit upside-down cake recipe cool completely before serving.
- Slice and enjoy this unique and tropical-flavored dessert!
Strawberry Fruit Recipe
49)![]() Ingredients For Strawberry Fro-Yo Cupcake Recipe:
Ingredients For Strawberry Fro-Yo Cupcake Recipe:
For The Cupcakes:
- 1 1/2 cups all-purpose flour
- 1 1/2 teaspoons baking powder
- 1/2 teaspoon baking soda
- 1/4 teaspoon salt
- 1/2 cup unsalted butter, softened
- 1 cup granulated sugar
- 2 large eggs
- 1 teaspoon vanilla extract
- 1/2 cup plain Greek yogurt
- 1/2 cup strawberry fruit puree (made from fresh or frozen strawberries)
- 2 cups frozen strawberries fruit
- 2 cups plain Greek yogurt
- 1/2 cup honey or maple syrup (adjust to taste)
- 1 teaspoon vanilla extract
![]() Instruction For Strawberry Fro-Yo Cupcake Recipe:
Instruction For Strawberry Fro-Yo Cupcake Recipe:
For The Cupcakes:
- Preheat your oven to 350°F (175°C). Line a muffin tin with cupcake liners.
- In a bowl, whisk together the flour, baking powder, baking soda, and salt. Set aside.
- In a separate large bowl, cream together the softened butter and granulated sugar until light and fluffy.
- Add the eggs, one at a time, mixing well after each addition. Stir in the vanilla extract.
- Gradually add the dry flour mixture to the wet mixture, alternating with the Greek yogurt and strawberry puree, beginning and ending with the dry ingredients. Mix until just combined.
- Divide the cupcake batter evenly among the cupcake liners, filling each about two-thirds full.
- Bake in the preheated oven for 18-20 minutes or until a toothpick inserted into the center of a cupcake comes out clean.
- Remove the cupcakes recipe from the oven and let them cool in the muffin tin for a few minutes before transferring them to a wire rack to cool completely.
- In a food processor or blender, combine the frozen strawberries fruit, plain Greek yogurt, honey or maple syrup, and vanilla extract.
- Blend until smooth and creamy, scraping down the sides of the bowl as needed.
- Taste the frozen yogurt mixture and adjust the sweetness with more honey or maple syrup if needed.
- Once the cupcakes are completely cooled, pipe or spoon the strawberry frozen yogurt onto each cupcake.
- Optionally, garnish with fresh strawberry fruit slices or sprinkles.
- Place the cupcakes in the freezer for about 20-30 minutes to firm up the frozen yogurt.
- Serve your Strawberry Fro-Yo Cupcakes recipe chilled and enjoy the delightful combination of moist strawberry cupcakes and creamy frozen yogurt recipe!
Tamarind Fruit Recipe
50)![]() Ingredients For Tamarind Millionaire's Shortbread Recipe:
Ingredients For Tamarind Millionaire's Shortbread Recipe:
For The Shortbread Base:
- 1 1/2 cups all-purpose flour
- 1/2 cup unsalted butter, softened
- 1/2 cup granulated sugar
- A pinch of salt
- 1 can (14 ounces) sweetened condensed milk
- 1/4 cup unsalted butter
- 1/4 cup tamarind fruit paste (adjust to taste)
- A pinch of salt
- 7 ounces (200g) dark chocolate, chopped
- 2 tablespoons unsalted butter
![]() Instruction For Tamarind Millionaire's Shortbread Recipe:
Instruction For Tamarind Millionaire's Shortbread Recipe:
For The Shortbread Base:
- Preheat your oven to 350°F (175°C). Grease and line a 9x9-inch (23x23 cm) square baking pan with parchment paper, leaving an overhang on two opposite sides for easy removal.
- In a mixing bowl, cream together the softened butter and granulated sugar until light and fluffy.
- Add the flour and a pinch of salt to the butter-sugar mixture. Mix until the ingredients come together and form a crumbly dough.
- Press the shortbread dough evenly into the bottom of the prepared baking pan.
- Bake in the preheated oven for 20-25 minutes or until the shortbread recipe is lightly golden. Remove it from the oven and let it cool while you prepare the caramel layer recipe.
- In a saucepan, combine the sweetened condensed milk, 1/4 cup of butter, tamarind fruit paste, and a pinch of salt.
- Heat the mixture over low to medium heat, stirring constantly. Continue cooking and stirring until the caramel thickens and starts to pull away from the sides of the pan. This can take about 10-15 minutes.
- Once the caramel is thick and reaches a deep amber color, remove it from the heat.
- Pour the tamarind caramel recipe over the cooled shortbread layer in the baking pan. Use a spatula to spread it out evenly.
- In a microwave-safe bowl or using a double boiler, melt the chopped dark chocolate and 2 tablespoons of butter together until smooth.
- Pour the melted chocolate over the tamarind caramel layer recipe, spreading it out evenly with a spatula.
- Refrigerate the pan for about 2-3 hours or until the caramel and chocolate layers are set.
- Once set, use the parchment paper overhang to lift the Tamarind Millionaire's Shortbread recipeout of the pan.
- Place it on a cutting board and use a sharp knife to cut it into squares or bars.
- Store the Tamarind Millionaire's Shortbread recipe in the refrigerator until ready to serve.
Tamarillo Fruit Recipe
51)![]() Ingredients For Creamy Tamarillo Cheesecake Recipe:
Ingredients For Creamy Tamarillo Cheesecake Recipe:
For The Crust:
- 1 1/2 cups graham cracker crumbs
- 1/4 cup granulated sugar
- 1/2 cup unsalted butter, melted
- 4 tamarillos fruit (tree tomatoes), peeled and pureed
- 24 ounces (3 cups) cream cheese, softened
- 1 cup granulated sugar
- 4 large eggs
- 1 teaspoon vanilla extract
- 1/4 cup all-purpose flour
- Zest of one lemon (optional)
- Tamarillo fruit slices for garnish (optional)
![]() Instruction For Creamy Tamarillo Cheesecake Recipe:
Instruction For Creamy Tamarillo Cheesecake Recipe:
For The Crust:
- Preheat your oven to 325°F (160°C). Grease a 9-inch (23 cm) springform pan.
- In a mixing bowl, combine the graham cracker crumbs, granulated sugar, and melted butter. Mix until the crumbs are evenly coated.
- Press the crumb mixture firmly into the bottom of the prepared springform pan to create the crust.
- Bake the crust in the preheated oven for 10 minutes. Remove it from the oven and let it cool while you prepare the cheesecake recipe filling. Keep the oven on.
- Peel the tamarillos fruit and puree them in a blender or food processor until smooth. Set aside.
- In a large mixing bowl, beat the cream cheese until it's smooth and creamy.
- Gradually add the granulated sugar and continue to beat until the mixture is well combined.
- Add the eggs, one at a time, beating well after each addition.
- Stir in the tamarillo fruit puree, vanilla extract, and optional lemon zest until everything is thoroughly combined.
- Gradually add the flour and mix until just incorporated. Be careful not to overmix.
- Pour the tamarillo cheesecake recipe filling over the baked graham cracker crust in the springform pan.
- Tap the pan on the counter a few times to remove any air bubbles and smooth the top.
- Place the springform pan in a larger pan or on a baking sheet to catch any potential leaks.
- Bake the cheesecake recipe in the preheated oven for 45-50 minutes or until the edges are set, but the center still has a slight jiggle.
- Turn off the oven and leave the cheesecake recipe in the oven with the door slightly ajar for about an hour to cool gradually.
- Remove the cheesecake recipe from the oven and refrigerate it for at least 4 hours or until fully chilled and set.
- Once chilled, remove the cheesecake recipe from the springform pan, garnish with tamarillo fruit slices if desired, and serve.
Tangerine Fruit Recipe
52)![]() Ingredients For Tangerine Drizzle Cake Recipe:
Ingredients For Tangerine Drizzle Cake Recipe:
For The Cake:
- 1 1/2 cups all-purpose flour
- 1 1/2 teaspoons baking powder
- 1/4 teaspoon salt
- 1/2 cup unsalted butter, softened
- 1 cup granulated sugar
- 2 large eggs
- 2 tablespoons tangerine fruit zest (from about 3 tangerines)
- 1/2 cup tangerine fruit juice (from about 3 tangerines)
- 1/4 cup plain Greek yogurt or sour cream
- 1/4 cup tangerine fruit juice
- 1/4 cup granulated sugar
- 1 cup powdered sugar
- 2-3 tablespoons tangerine fruit juice
![]() Instruction For Tangerine Drizzle Cake Recipe:
Instruction For Tangerine Drizzle Cake Recipe:
For The Cake:
- Preheat your oven to 350°F (175°C). Grease and flour a 9x5-inch (23x13 cm) loaf pan.
- In a bowl, whisk together the flour, baking powder, and salt. Set aside.
- In a separate large bowl, cream together the softened butter and granulated sugar until light and fluffy.
- Add the eggs one at a time, mixing well after each addition.
- Stir in the tangerine fruit zest and tangerine fruit juice.
- Gradually add the dry flour mixture to the wet mixture, alternating with the Greek yogurt or sour cream, beginning and ending with the dry ingredients. Mix until just combined.
- Pour the cake batter into the prepared loaf pan, spreading it out evenly.
- Bake in the preheated oven for 45-50 minutes or until a toothpick inserted into the center of the cake comes out clean.
- While the cake is baking, make the tangerine drizzle recipe. In a small saucepan, combine 1/4 cup of tangerine juice and 1/4 cup of granulated sugar.
- Heat the mixture over low heat, stirring until the sugar dissolves and the syrup thickens slightly. This will take about 3-4 minutes.
- Remove the saucepan from the heat and set the tangerine syrup recipe aside.
- Once the cake is out of the oven, while it's still warm, use a skewer or toothpick to poke several holes all over the top of the cake.
- Slowly pour the tangerine drizzle recipe evenly over the warm cake, allowing it to soak in.
- Let the cake cool in the pan for about 15 minutes, then remove it from the pan and place it on a wire rack to cool completely.
- In a small bowl, whisk together 1 cup of powdered sugar and 2-3 tablespoons of tangerine fruit juice until you have a smooth glaze.
- Drizzle the tangerine glaze over the cooled cake.
- Let the glaze set for a few minutes before slicing and serving your delicious Tangerine Drizzle Cake recipe.
Ugly Fruit Recipe
53)![]() Ingredients For Chocolate Ugly Cake Recipe:
Ingredients For Chocolate Ugly Cake Recipe:
For The Cake:
- 1 1/2 cups all-purpose flour
- 1 cup granulated sugar
- 1/4 cup unsweetened cocoa powder
- 1 teaspoon baking soda
- 1/2 teaspoon salt
- 1 cup water
- 1/3 cup vegetable oil
- 1 tablespoon white vinegar
- 1 teaspoon vanilla extract
- 1/2 cup heavy cream
- 1 cup semisweet chocolate chips
![]() Instruction For Chocolate Ugly Cake Recipe:
Instruction For Chocolate Ugly Cake Recipe:
For The Cake:
- Preheat your oven to 350°F (175°C). Grease and flour an 8x8-inch (20x20 cm) square baking pan.
- In a large mixing bowl, whisk together the flour, granulated sugar, cocoa powder, baking soda, and salt.
- In a separate bowl, mix together the water, vegetable oil, white vinegar, and vanilla extract.
- Pour the wet ingredients into the dry ingredients and stir until just combined. Do not overmix; a few lumps are okay.
- Pour the cake batter into the prepared baking pan.
- Bake in the preheated oven for 30-35 minutes or until a toothpick inserted into the center of the cake comes out clean.
- Remove the cake recipe from the oven and let it cool in the pan for about 10 minutes before transferring it to a wire rack to cool completely.
- In a small saucepan, heat the heavy cream over medium-low heat until it's hot but not boiling.
- Remove the saucepan from the heat and add the semisweet chocolate chips recipe. Stir until the chocolate is completely melted and the mixture is smooth.
- Once the cake is completely cooled, you can choose to frost it with the chocolate ganache recipe or leave it plain.
- If using the ganache, pour it over the top of the cake and spread it out evenly with a spatula.
- Let the ganache set for a while before slicing and serving.
Velvet Apple Fruit Recipe
54)![]() Ingredients For Red Velvet Apple Cookies Recipe:
Ingredients For Red Velvet Apple Cookies Recipe:
- 1 3/4 cups all-purpose flour
- 1/4 cup unsweetened cocoa powder
- 1 teaspoon baking powder
- 1/2 teaspoon baking soda
- 1/2 teaspoon salt
- 1/2 cup unsalted butter, softened
- 1 cup granulated sugar
- 1 large egg
- 2 teaspoons vanilla extract
- 2 tablespoons buttermilk
- 2 tablespoons red food coloring (adjust to your preference)
- 1 cup peeled, cored, and grated apples fruit (about 1 large apple)
- 1 cup white chocolate chips or chunks (optional)
- Powdered sugar for dusting (optional)
![]() Instruction For Red Velvet Apple Cookies Recipe:
Instruction For Red Velvet Apple Cookies Recipe:
- Preheat your oven to 350°F (175°C). Line baking sheets with parchment paper.
- In a mixing bowl, whisk together the flour, cocoa powder, baking powder, baking soda, and salt. Set aside.
- In another bowl, cream together the softened butter and granulated sugar until light and fluffy, about 2-3 minutes.
- Add the egg and vanilla extract to the butter-sugar mixture. Beat until well combined.
- Mix in the buttermilk and red food coloring until the mixture is evenly colored.
- Gradually add the dry ingredients to the wet ingredients, mixing until just combined.
- Gently fold in the grated apples fruit and white chocolate chips or chunks recipe, if using.
- Drop spoonfuls of cookie dough onto the prepared baking sheets, spacing them about 2 inches apart.
- Bake in the preheated oven for 10-12 minutes or until the edges are set but the centers are still slightly soft. Be careful not to overbake; you want them to be chewy.
- Remove the cookies recipe from the oven and let them cool on the baking sheets for a few minutes before transferring them to a wire rack to cool completely.
- If desired, dust the cooled cookies with powdered sugar for a finishing touch.
- Enjoy your Red Velvet Apple Cookies recipe with a glass of milk or a cup of coffee!
Walnut Fruit Recipe
55)![]() Ingredients For Maple Walnut Blondies Recipe:
Ingredients For Maple Walnut Blondies Recipe:
- 1/2 cup (1 stick) unsalted butter, melted
- 1 cup light brown sugar, packed
- 1 large egg
- 1 teaspoon pure vanilla extract
- 1/4 cup pure maple syrup
- 1 cup all-purpose flour
- 1/2 teaspoon baking powder
- 1/4 teaspoon salt
- 1/2 cup chopped walnuts, toasted
- 1 cup powdered sugar
- 2 tablespoons pure maple syrup
- 1-2 tablespoons milk or cream
- Additional toasted walnuts for garnish (optional)
![]() Instruction For Maple Walnut Blondies Recipe:
Instruction For Maple Walnut Blondies Recipe:
For The Maple Walnut Blondies:
- Preheat your oven to 350°F (175°C). Grease and line an 8x8-inch (20x20 cm) square baking pan with parchment paper, leaving an overhang on two opposite sides for easy removal.
- In a mixing bowl, whisk together the melted butter and brown sugar until well combined.
- Add the egg, vanilla extract, and maple syrup to the butter-sugar mixture. Mix until smooth.
- In a separate bowl, whisk together the flour, baking powder, and salt.
- Gradually add the dry ingredients to the wet ingredients, stirring until just combined.
- Gently fold in the chopped toasted walnuts fruit.
- Pour the blondie batter into the prepared baking pan, spreading it out evenly.
- Bake in the preheated oven for 20-25 minutes or until the edges are golden brown and a toothpick inserted into the center comes out with a few moist crumbs.
- Remove the blondies recipe from the oven and let them cool in the pan for about 10 minutes.
- In a bowl, whisk together the powdered sugar, pure maple syrup, and 1-2 tablespoons of milk or cream until you have a smooth glaze. Adjust the consistency by adding more milk or cream if needed.
- Drizzle the maple glaze over the slightly warm blondies in the pan.
- Optionally, garnish with additional toasted walnuts fruit for added texture and flavor.
- Let the blondies cool completely in the pan before using the parchment paper overhang to lift them out.
- Once fully cooled, cut the Maple Walnut Blondies recipe into squares or bars.
Watermelon Fruit Recipe
56)![]() Ingredients For Watermelon Pudding Recipe:
Ingredients For Watermelon Pudding Recipe:
- 4 cups of fresh watermelon fruit cubes (seedless)
- 1/2 cup granulated sugar (adjust to taste)
- 1/4 cup cornstarch
- A pinch of salt
- 1 cup milk (whole milk or any milk of your choice)
- 1/2 cup heavy cream
- 1 teaspoon vanilla extract
- Fresh mint leaves for garnish (optional)
![]() Instruction For Watermelon Pudding Recipe:
Instruction For Watermelon Pudding Recipe:
- In a blender, puree the fresh watermelon fruit cubes until smooth. You should have about 2 cups of watermelon fruit puree. Strain the puree through a fine-mesh sieve into a bowl to remove any seeds or pulp. Set aside.
- In a separate bowl, whisk together the granulated sugar, cornstarch, and a pinch of salt until well combined.
- In a saucepan, combine the milk and heavy cream. Heat the mixture over medium heat until it's warm but not boiling. Remove it from the heat.
- Gradually whisk the sugar-cornstarch mixture into the warm milk and cream mixture until it's smooth and well combined.
- Return the saucepan to the stovetop and cook over medium-low heat, stirring constantly. Continue to cook until the mixture thickens and comes to a gentle boil. This should take about 5-7 minutes.
- Once the mixture has thickened, remove it from the heat.
- Gradually whisk the watermelon fruit puree into the thickened mixture until well incorporated.
- Stir in the vanilla extract to enhance the flavor.
- Pour the watermelon pudding recipe mixture into serving bowls or glasses.
- Allow the pudding to cool to room temperature, then cover it with plastic wrap and refrigerate for at least 2 hours to set.
- Before serving, garnish with fresh mint leaves, if desired, for a touch of freshness and color.
- Serve your Watermelon Pudding recipe chilled and enjoy the refreshing taste of summer!
Wolfberry Fruit Recipe
57)![]() Ingredients For Wolberry And White Chocolate Recipe:
Ingredients For Wolberry And White Chocolate Recipe:
- 1/2 cup (1 stick) unsalted butter, softened
- 1/2 cup granulated sugar
- 1/2 cup brown sugar, packed
- 1 large egg
- 1 teaspoon pure vanilla extract
- 1 1/2 cups all-purpose flour
- 1/2 teaspoon baking soda
- 1/4 teaspoon salt
- 1 cup white chocolate chips or chunks
- 1/2 cup dried wolfberries fruit (goji berries)
![]() Instruction For Wolberry And White Chocolate Recipe:
Instruction For Wolberry And White Chocolate Recipe:
- Preheat your oven to 350°F (175°C). Line baking sheets with parchment paper.
- In a mixing bowl, cream together the softened butter, granulated sugar, and brown sugar until light and fluffy.
- Add the egg and vanilla extract to the butter-sugar mixture. Mix until well combined.
- In a separate bowl, whisk together the flour, baking soda, and salt.
- Gradually add the dry ingredients to the wet ingredients, mixing until just combined.
- Gently fold in the white chocolate chips or chunks and dried wolfberries fruit (goji berries).
- Drop spoonfuls of cookie dough onto the prepared baking sheets, spacing them about 2 inches apart.
- Bake in the preheated oven for 10-12 minutes or until the edges are golden brown and the centers are set.
- Remove the cookies from the oven and let them cool on the baking sheets for a few minutes before transferring them to a wire rack to cool completely.
- Enjoy your Wolfberry and White Chocolate Cookies recipe with a glass of milk or your favorite beverage!
Yuzu Fruit Recipe
58)![]() Ingredients For Yuzu Pound Cake Recipe:
Ingredients For Yuzu Pound Cake Recipe:
For The Cake:
- 1 cup unsalted butter, softened
- 2 cups granulated sugar
- 4 large eggs
- 2 tablespoons yuzu fruit juice (or more for a stronger flavor)
- 1 tablespoon yuzu fruit zest
- 2 cups all-purpose flour
- 1/2 teaspoon baking powder
- 1/2 teaspoon salt
- 1/2 cup whole milk
- 1 cup powdered sugar
- 2-3 tablespoons yuzu fruit juice (adjust for desired consistency)
![]() Instruction For Yuzu Pound Cake Recipe:
Instruction For Yuzu Pound Cake Recipe:
For The Yuzu Pound Cake:
- Preheat your oven to 325°F (160°C). Grease and flour a 9x5-inch (23x13 cm) loaf pan.
- In a mixing bowl, cream together the softened butter and granulated sugar until light and fluffy.
- Add the eggs, one at a time, mixing well after each addition.
- Stir in the yuzu fruit juice and yuzu zest until well combined. Adjust the amount of yuzu fruit juice to your taste.
- In a separate bowl, whisk together the flour, baking powder, and salt.
- Gradually add the dry ingredients to the wet ingredients, alternating with the whole milk, beginning and ending with the dry ingredients. Mix until just combined.
- Pour the cake batter into the prepared loaf pan, spreading it out evenly.
- Bake in the preheated oven for 60-70 minutes or until a toothpick inserted into the center of the cake comes out clean.
- Remove the cake from the oven and let it cool in the pan for about 10 minutes before transferring it to a wire rack to cool completely.
- In a bowl, whisk together the powdered sugar and yuzu fruit juice until you have a smooth glaze. Adjust the amount of yuzu fruit juice for your desired glaze consistency.
- Once the cake is completely cooled, drizzle the yuzu glaze recipe over the top of the cake.
- Allow the glaze to set for a few minutes before slicing and serving your Yuzu Pound Cake recipe.
Yumberry Fruit Recipe
59)![]() Ingredients For Yumberry Pudding Recipe:
Ingredients For Yumberry Pudding Recipe:
- 2 cups fresh yumberries fruit (or frozen yumberries, thawed)
- 1/2 cup granulated sugar (adjust to taste)
- 2 tablespoons cornstarch
- 1/4 cup water
- 1 teaspoon lemon juice (optional)
- Fresh mint leaves for garnish (optional)
![]() Instruction For Yumberry Pudding Recipe:
Instruction For Yumberry Pudding Recipe:
- Wash the fresh yumberries fruit thoroughly and remove any stems or leaves. If using frozen yumberries, make sure they are thawed.
- In a blender or food processor, puree the yumberries fruit until smooth. You can strain the puree through a fine-mesh sieve to remove any seeds if desired.
- In a small bowl, combine the cornstarch and water to make a smooth paste. Set aside.
- In a saucepan, combine the yumberry fruit puree and granulated sugar. Heat over medium-low heat, stirring constantly until the mixture begins to simmer.
- Once the yumberry fruit mixture is simmering, gradually whisk in the cornstarch paste.
- Continue to cook and stir the mixture for about 3-5 minutes or until it thickens and becomes smooth and glossy.
- Remove the saucepan from the heat and stir in the lemon juice, if using, for a hint of brightness.
- Pour the yumberry pudding recipe into serving bowls or glasses.
- Allow the pudding to cool to room temperature, then cover it with plastic wrap and refrigerate for at least 2 hours to set.
- Before serving, garnish with fresh mint leaves, if desired, for added freshness and color.
- Serve your Yumberry Pudding recipe chilled and enjoy the unique and delicious flavor of yumberries fruit!
Zante Currant Fruit Recipe
60)![]() Ingredients For Carrot Cake With Zante Currant And Cardamom Recipe:
Ingredients For Carrot Cake With Zante Currant And Cardamom Recipe:
For The Cake:
- 2 cups all-purpose flour
- 2 cups grated carrots (about 3-4 large carrots)
- 1 cup Zante currants fruit (also known as Corinthian raisins)
- 1 cup granulated sugar
- 1/2 cup brown sugar, packed
- 1 cup vegetable oil
- 4 large eggs
- 1 teaspoon vanilla extract
- 1 1/2 teaspoons ground cinnamon
- 1/2 teaspoon ground cardamom
- 1/2 teaspoon ground nutmeg
- 1/2 teaspoon baking powder
- 1/2 teaspoon baking soda
- 1/2 teaspoon salt
- 8 ounces (1 package) cream cheese, softened
- 1/2 cup unsalted butter, softened
- 4 cups powdered sugar
- 1 teaspoon vanilla extract
![]() Instruction For Carrot Cake With Zante Currant And Cardamom Recipe:
Instruction For Carrot Cake With Zante Currant And Cardamom Recipe:
For The Cake:
- Preheat your oven to 350°F (175°C). Grease and flour two 9-inch (23 cm) round cake pans.
- In a large mixing bowl, combine the grated carrots and Zante currants fruit. Set aside.
- In another bowl, whisk together the all-purpose flour, ground cinnamon, ground cardamom, ground nutmeg, baking powder, baking soda, and salt.
- In a separate large mixing bowl, whisk together the granulated sugar, brown sugar, vegetable oil, eggs, and vanilla extract until well combined.
- Gradually add the dry flour mixture to the wet mixture, mixing until just combined.
- Fold in the grated carrots and Zante currants fruit until evenly distributed in the batter.
- Divide the batter equally between the prepared cake pans.
- Bake in the preheated oven for 25-30 minutes or until a toothpick inserted into the center of the cakes comes out clean.
- Remove the cakes from the oven and let them cool in the pans for about 10 minutes. Then, transfer the cakes to a wire rack to cool completely.
- In a mixing bowl, beat the softened cream cheese and unsalted butter together until smooth and creamy.
- Gradually add the powdered sugar and vanilla extract, continuing to beat until the frosting is light and fluffy.
- Once the cakes are completely cooled, place one layer on a serving plate.
- Spread a layer of cream cheese frosting on top of the first layer.
- Place the second cake layer on top and frost the top and sides of the entire cake with the remaining cream cheese frosting.
- Optionally, garnish the cake with additional Zante currants fruit or grated carrots for decoration.
- Slice and serve your delicious Carrot Cake with Zante Currant and Cardamom recipe!


